Roasted Celeriac and Wild Rice Salad

Image

This week has been busy. Like really busy. I started a new job (EEEEE), am attempting to make friends, trying to keep up with posting, walk the poor pup who thinks I’ve deserted him, finish my book before the weekend, and watch my foodie shows. Yes, I have left out eating, sleeping and working out. But I’ve prepared for this, or well, tried to prepare for this.

Last week I made a lot of soups, (all soups that are here, here, and here) don’t worry, I didn’t leave any out. Those were then frozen for lunches. I also made an insane grocery trip and planned out lunches for a while.

Always inspired by Ottolenghi, I often use the recipe structures he has in his cookbooks and tweak them to what’s available and in season around here. And while when I was in London it was all too easy to get a hold of duck eggs and wild mushrooms, sorrel and sumac, in Chicago it takes a little too much effort. Often times then I find myself finding suitable switches that will keep the integrity of the dish.

*This dish is based off of Ottolenghi’s, Celeriac and lentils with hazelnut and mint recipe found here.

Roasted Celeriac and Wild Rice Salad:

Makes enough for 4 lunches (or 4 small servings)

Ingredients:

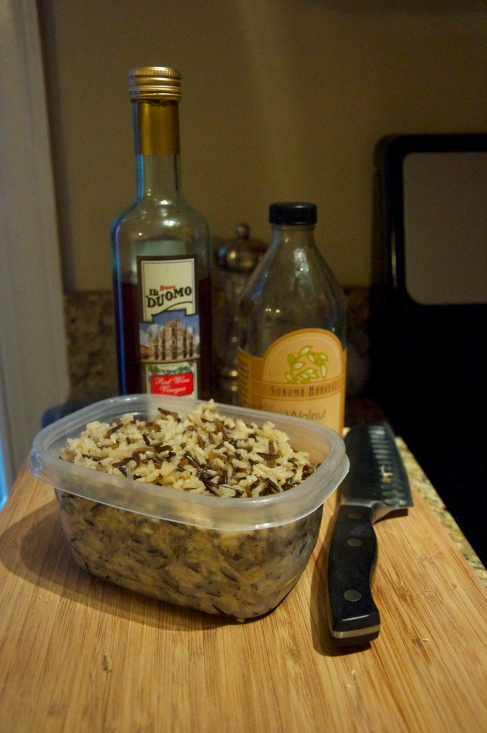
  • 1 C. wild rice
  • 1 C. brown rice
  • 2 C. chicken broth
  • 1 bunch fresh thyme
  • 2 Tbsp walnut oil
  • 1 Tbsp salt
  • 1 large celeriac root, peeled and cut into cm thick shapes
  • 3 sprigs fresh mint leaves, chopped
  • 1 Tbsp red wine vinegar (per portion)
  • 1 C. walnuts

1. Preheat oven to 400 degrees.

2. Mix wild and brown rice in medium pot and toast on medium heat for about 3-5 minutes, stirring every so often. Toasted grains aids in their ability to soak up water and adds another dimension of flavor. Add in broth, bring to boil, reduce to simmer, add thyme bunch, and cover for about 45-60 minutes.

Image

3. Meanwhile, peel and cut celeriac into cm sized pieces (about 1cm deep and wide, by 3-4 cm long). Place on sheet pan and drizzle oil and salt. Roast for about 25–30 minutes. Celeriac should be soft and slightly golden.

4. On another sheet pan, lay out walnuts. Once oven is free, place walnuts on center shelf and roast for about 10 minutes. Allow to cool and then roughly chop.

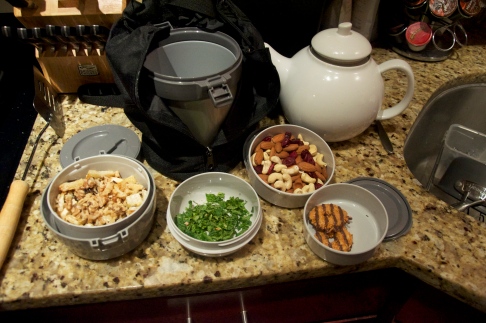
5. Once rice has cooled, mix with celeriac root and 1 tsp of red wine vinegar per portion. When ready to serve hot, mix immediately with walnuts and add chop mint to top. If serving cold, keep walnuts and mint separated from the rice and celeriac mixture until ready to eat.
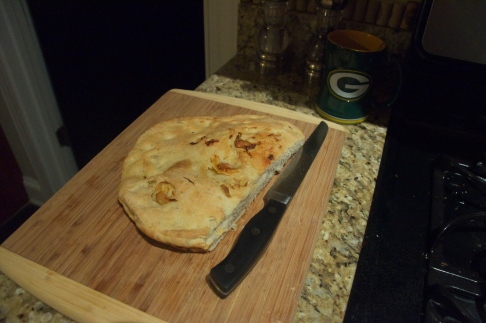
Roasted Garlic Focaccia Bread

Image

Ah January, the month where boat dreams start slipping into my nightly repertoire. The beginnings  of imagining warm breezes, and summer cookouts. The time to pull it together and realize those won’t happen for another 4–5 months. And even then, up here, you cannot predict.

These past few days have been driving me a little stir crazy. I don’t start my (new!) job for another week, which means I have some days to play. And while I have a list of all the things I want to get done before I start, it needs to not be -10 degrees outside in order for me to leave the premises. I have some serious book and tea shopping to get done.

So while I was holed up in my little apt, trying to keep the heat down so that we don’t have a gigantic gas bill again, I thought, if anything, what could make this day better? Bread. Bread and soup. I then picked out the garlic soup from the freezer and figured I’d take the garlic route with the bread too. Not like I was going to be seeing or speaking to anyone this iceland of an evening.

Baking is hard. This focaccia, not so hard.

Roasted Garlic Focaccia Bread:

Feeds 2–3 people (or 1 if you are a bread fiend like myself)

Ingredients:

  • 2 C. bread or all purpose flour (if that’s all you have)
  • 1 Tsp yeast
  • 3/4 C. warm water
  • 1 Tsp sugar
  • 3 Tbsp olive oil and some drizzling oil
  • 2 Tbsp rosemary
  • 1 Tbsp salt
  • 1 head of garlic

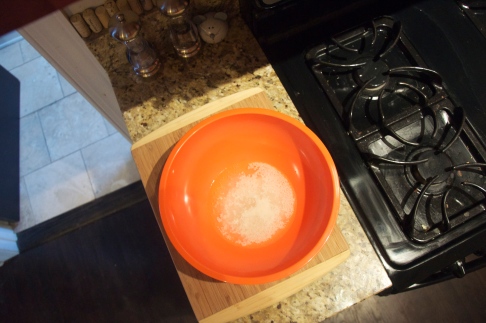
1. Activate yeast by mixing it with the warm water and sugar. Allow to sit for about 5 minutes.

Image

2. In a mixer bowl, gently mix the flour, salt, rosemary, and 1 Tbsp olive oil.

3. Make a pond in the middle of the dry ingredients and pour in yeast water. Mix by hand until roughly incorporated.

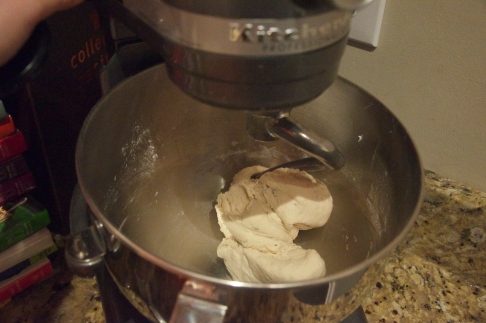
4. Using the kneading hook on your mixer, place on level 2 for 10 minutes. If you don’t have a mixer, continue kneading the dough by hand for 10 minutes (hard!).

Image

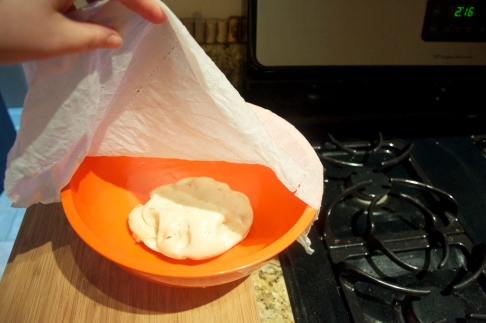
5. Remove dough from mixer and place in medium sized bowl that has a drizzle of olive oil spread along the sides (so that when the dough rises it won’t stick). Cover with a damp paper towel or kitchen towel and place somewhere that is around 70 degrees.

*While this seems silly, my bread barely rose because my apt is in the middle of Chiberia. Yes. I am pulling THAT card. Try putting it in a small, inclosed room. 

Image

6. Allow the bread to rise from anywhere between 3–8 hours.

7. While the bread is nearing the end of its rising, heat the oven to 375 degrees.

8. Take your garlic head and slice off the top, enough so that each clove is slightly exposed.

9. Drizzle some olive oil on the top, wrap it in aluminum foil, and pop it in the oven for 45 minutes.

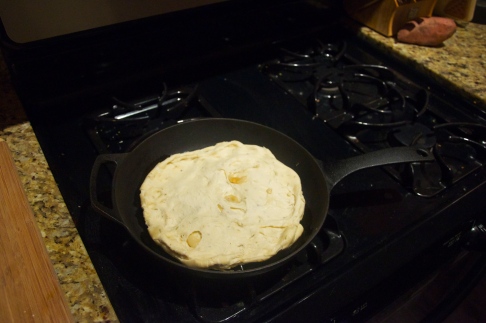
10. Once the bread has risen, put 1 Tbsp of olive oil in the bottom of a iron skillet and then place bread on top, shaping it into the pan. *The olive oil will help give the bottom of the focaccia a good crunch.

Image

11. Once the garlic is done, remove the roasted cloves by squeezing the bottom of the garlic head and popping them out of their skins.

12. Using your finger, make little holes in the top of the bread and push the garlic cloves into them. Cover some if you like, or leave them all poking out.

13. Raise the oven temp to 400 degrees and bake your bread from 25–35 minutes. My arctic atmosphere caused it to take a little longer.

Serving options:

  • Good olive oil and balsamic
  • Alongside some soup

Provincial Garlic Soup

Image

You may see this title and think “Dear God my breath would stink forever.” But here is the twist to this soup, the garlic, in the end, will not taste like the harsh uncooked garlic that keeps vampires away, nor will it taste like the delicious wafting smell of roasted garlic. Instead, this soup has a mellow garlic taste. This is because when boiling the garlic, the flavor deepens the broth but doesn’t accentuate the garlic itself.

I stumbled across my first garlic soup recipe a few years ago. It was the dead of winter and somehow I was up to my ears in garlic heads. This was college, meaning that all I had was garlic heads. So I began hunting down recipes for what to do with them. Lots of chicken recipes popped up, a few breads and some roasted garlic garlic soups. But at this point in the winter I start needing healthier meals. I look for recipes that take the seasonal ingredients but use them in a lighter way than stew. Even though I really like stew.

Anyways, a few years later, I find myself in a similar predicament. Some how, unclear to me and my roommate, we gathered a hoard of garlic heads. I’m talking like upwards of 15 garlic heads. I don’t know how or why, but they have been taking up space in the spice cabinet and it was time to use them. I remembered this garlic soup as being tasty and healthy and decided to try it once again. This is a pretty classic, simple, French recipe; I added a few things here and there but really, you can’t do much to a classic.

Also if you didn’t know, garlic is extremely healthy for you and has been used to help cure different ailments like intestinal problems, cold and flu symptoms, and it even boosts metabolism and is great for skin and hair.

Provincial Garlic Soup:

Makes about 5-6 cups

Ingredients:

  • 20-25 cloves of garlic, peeled
  • 6 C. Chicken broth or 3:3 chicken stock and water *Can use vegetable broth to make vegetarian
  • 2 bay leaves
  • 5 thyme twigs
  • 6 egg yolks
  • 1/2 C. grated parmesan

1. In a soup pot pour in chicken soup or stock/water, garlic and herbs, boil on low for about 45 minutes.

2. Remove herbs.

3. In medium sized bowl, mix together egg yolks and parmesan.

4. Slowly dribble in a ladle of broth. SLOWLY. While still mixing the egg mixture. You have to do this as slow as possible so as not to curdle the eggs. Do this with 3-4 ladles of broth.

5. Pour newly made broth into the  soup pot slowly. Using an immersion blender (or you can pour into regular blender, but remember to keep part of the top of for the steam), blend the soup together until smooth.

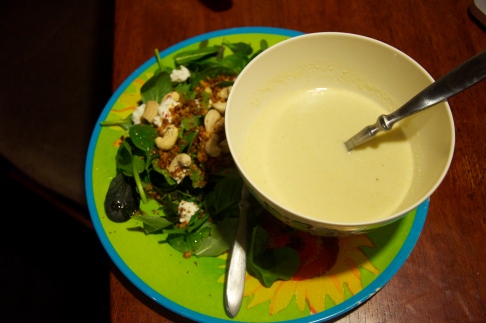
6. Serve with a small side salad, croutons, bread and some fresh parsley.

Image

Cure-All Tea

Image

Today it is cold. Very cold. And to make matters worse, or at least mornings worse, my train was stopped for 20 mins this morning, with me next to the door leaking the freezing cold air in. I was a human popsicle; sniffling, coughing, and being given death glances from everyone around me. Don’t you wish now that you hadn’t tried to pack yourself in next to me? I am not a freezee pop you can accordion into the corner; I mildly hope they all get a cold. Sadly, that was only the start to my not-so-great morning.

Once I got home, I threw on my sweats, my most comfortable sweater and began to cook. But even before I did that I made tea. Now most people are either a tea or a coffee person. I am both. I drink my coffee in the morning similarly to how Clarence the dog attacks his food bowl at every meal; as if our existence on Earth counted on it. But after my morning rush of energy, I like tea to hold me up throughout the day.

This tea I started making a few years ago and discovered that it has magic powers. If I take it right at the start of a cold, drink it all throughout a day, my cold will disappear. A winter miracle. Rather than this be a recipe I put my name on, it is more of an old-wives tale type recipe that has been shared for hundreds of years, and it is my turn now to share it with you.

Cure-All Tea:

Ingredients:

  • 1 inch ginger, peeled and sliced
  • 1/2 lemon, sliced
  • 1 tbsp honey per glass
  • 5 juniper berries

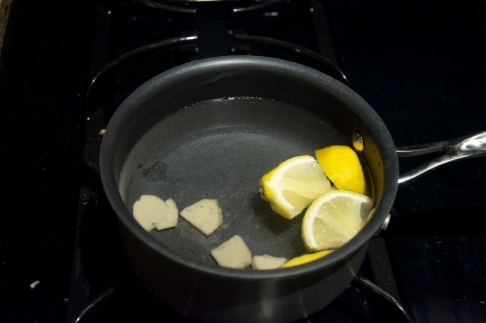
1. Slow boil the juniper berries, ginger and lemon for at least 30 minutes.

2. Fill a mug and stir in honey.

3. Add more water to pot and heat on low throughout the day.

4. If you want to make this in advance, make a big pot of it like it was soup and then put in a pitcher in the fridge. Warm and drink when desired.

Wine and Cherry Beef Stew

Image

Have you ever invited someone over for dinner and then realize that you have barely anything in your fridge? Well, I’ve been traveling around a lot lately so my trip to the grocery this week was a struggle. How much weight can I carry 6 blocks? Milk or pickles? Cans of beans or tomatoes? Some serious choices had to be made and ingredients had to be left behind. Thus my very empty fridge and pantry.

But I’ve always been a rather scrappy cook (something I learned from my college days) and knew I could find something delicious to whip up. In my freezer I find the last of my frozen meat, a package of stew meat. Stew meat is cuts of a beef roast like chuck or butcher cuts of steak and loin, and are generally tough meats that need to be cooked or braised for a while in order to become tender. Add some butter, the last cup of red wine and some cherry juice I had for a cocktail recipe a while back and wah-lah, a perfect braising liquid.

Leaning towards the beef bourguignon route of preparation, I added some carrots, kept adding to the braising liquid, and allowed the stew to, well, stew for a few hours. Served with the Herb Spaetzle, it made a pretty fancy meal for having nothing in the house.

Wine and Cherry Beef Stew

Feeds 2 people

Ingredients:

  • 1 package stew meat (about 1-2lbs)
  • 1 C. red wine
  • 3/4 C. cherry juice
  • *water as needed for braising liquid
  • 2 bay leaves
  • 1 tsp thyme
  • 3 whole carrots, peeled and cut into fourths
  • 1/2 C. flour
  • 3 Tbsp butter
  • 1 tsp salt

Image

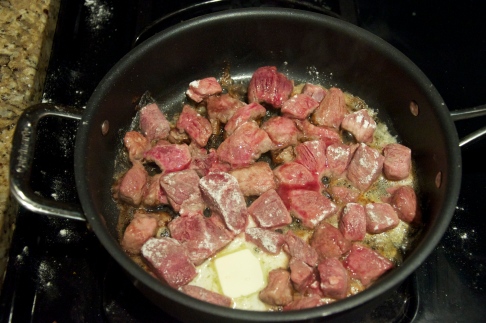
1. Dry of each piece of meat and dredge in flour. This will give the beef a beautiful sear and allow it to soak up the flavors of the braise.

Image

2. Saute meat in large sauce pan with the melted butter, sprinkle with salt. Cook until meat looks golden brown. (If you have an onion, I would chop and add here. It will add a dimension of flavor.)

3. Add in wine, cherry juice, and herbs.

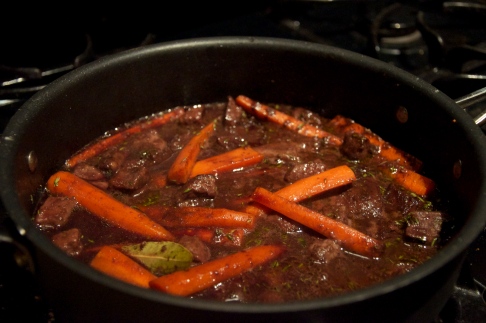
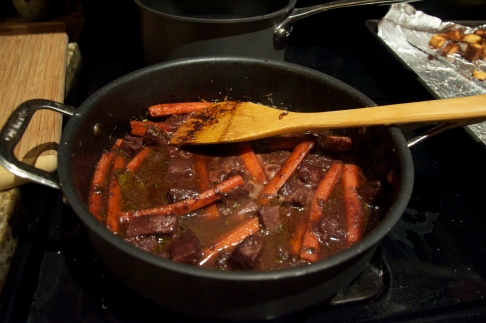
4. Add in carrots.

Image

5. Reduce heat to low and allow stew to braise for up to 2 hours. Make sure the braising liquid is always at the same height as the meat by adding a little water at a time. Stir every half hour. Remove bay leaves and enjoy!

Serving options:

  • Classically this goes great with potatoes: mashed, gratined, or even just baked.
  • Risotto would add heartiness and richness as well as is substantial enough to side with the stew.
  • Small pasta like fuselli, spaetzle, or farfalle.

Leftover Edition: Split Pea Soup

Image

After the holidays we are all left with leftovers that have no friends. Mash potatoes without a roast, a chicken or turkey carcass with slim pickings, a ham that has given its last full ham sandwich, the fridge has grown quite confused. Being a firm believer in leftovers, however, I know there is rarely a Tupperware or crumble of food that cannot find a good home.

Mashed potatoes, meet mashed potato and rosemary bread. (Coming soon)

Turkey and Chicken carcass, meet your best friend, Stock

Ham bone, meet the soup of your dreams, Split pea

You were all besties in another life, I promise.

Split Pea Soup

Feeds about 8 people, or 2-3 people for a couple days

Ingredients:

  • 1 lb dried split peas (one bag)
  • 1 leftover ham bone *If there is barely any ham left, use a ham steak as well to your taste
  • 10 thyme sprigs
  • 3 carrots
  • 1 large onion
  • 2 celery
  • 6 cups water or water leftover stock mix
  • 1 tsp olive oil or butter

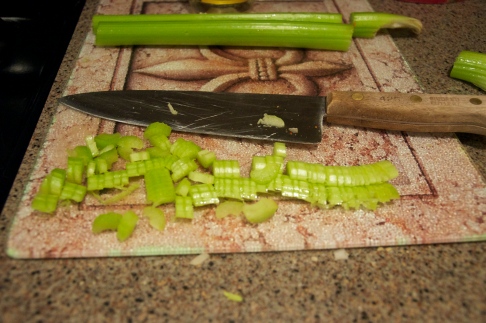
1. Make your mirepoix (chopped mixture of your celery, onion, and carrot) and warmed oil/butter in large soup pot. Cook on medium for about 3-5 minutes or until it becomes tender.

Image

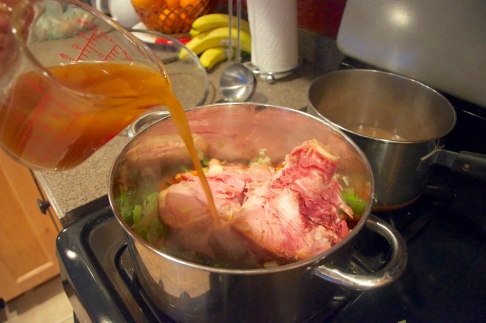
2. Add in ham bone and thyme. Allow to cook for 3-5 minutes or until the ham bone is warmed.

Image

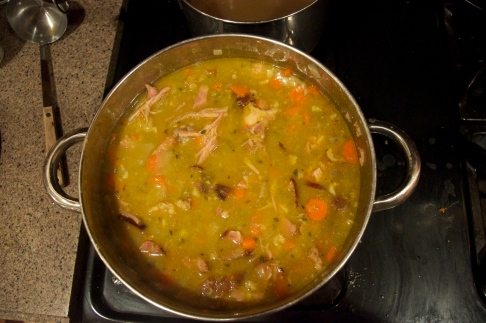
3. Add in water/stock mix, bring to boil, reduce to simmer.

4. Add in split peas, stir.

5. Reduce heat to low and allow to cook, covered, for 2 hours.

6. This soup tends to become very thick, pour in water until texture desired before serving.

Serve with:

  • Crusty loaf of bread
  • small side salad with a goat cheese (goat and ham, yum)
  • garlic bread (no cheese)

Roasted Butternut Squash Risotto

Image

I know, it’s been awhile. Forgive me, the holidays (and the fact that I cooked for most family events) made it difficult for me to write as much as I wanted to. There was a blizzard-cookie baking weekend of madness before Christmas, an entire Christmas brunch and dinner on the Day, and another “holiday” meal a few days after. And you know what? I loved every second of it.

Well, except for the last meal that I had to prepare entirely with a steak knife. Do you know how hard it is to make potatoes au gratin with a steak knife? I felt like I was on Cuthroat Kitchen.

Before I get into all these recipes that made my holidays so lovely, I want to talk about my delicious moment of joy found with butternut squash risotto. One thing you should know about my winters is that it is cold here. I bop between my Chicago apt and my Wisconsin hometown pretty often and right now, there is a winter weather warning in both- I just can’t escape. So having lived my whole life in the wintery lands of the north, I have come to love all things roasted in the winter time.

Why Roasting is the best thing ever:

  1. Using the oven aids in heating your home (no joke)
  2. Roasting makes all root vegetables taste like heaven
  3. If you are in a climate similar to my own, you understand that tomatoes just aren’t the same in the winter. Neither are zucchinis or fresh herbs. But you roast those babies with some hand dried basil or sage from summer and you will forget that freshness matters.

Roasting the b-nut is just the start. Do not fear the risotto. Forget the fact that at least 1 person a season goes home on Top Chef for it. Forget the burners and the soggy rice makers. You must have patience. You must stir. And then, you will be a risotto queen.

Roasted Butternut Squash Risotto

Feeds 2 people as a meal, 4 as a side dish

Ingredients:

  • 1 C. arborio rice
  • 1 butternut squash
  • 3 C. chicken broth, preferably homemade, otherwise I use KitchenBasics (no gluten or yeast) *If using stock use a 2:1 water ratio
  • 1 onion
  • 1 tbsp bouquet garni
  • 2 Tbsp butter
  • 1 C. parmesan
  • a handful of roasted butternut squash seeds, or pepitas

1. Preheat oven to 400 degrees.

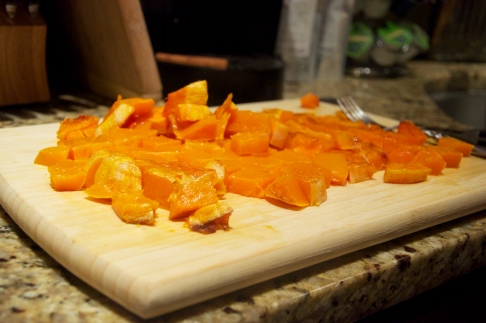
2. Peel butternut squash, scoop out seeds (save for topping), and dice. Place on cookie sheet and roast for 30-45 minutes until soft and slightly golden on the bottom.

3. Peel and dice the onion, put in large sauce pan with 2 tbsp butter. Cook on medium until onion is soft but not golden.

Image

4. Add in rice and coat in butter. Stir for two minutes or until butter, rice and onion are all incorporated.

5. Add in 1 C. chicken broth and increase temp to medium-high. Continue stirring every so often.

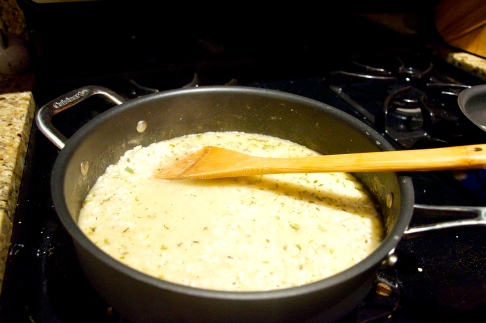
6. When rice has soaked up the first cup of chix broth, add the second cup. Continue to stir every so often. Add in bouquet garni.

Image

7. Allow the risotto to simmer and as the rice soaks up the liquid a second time, add in slowly the last cup. Continue to simmer and add in the parmesan. After about 5 minutes, add in the roasted butternut squash.

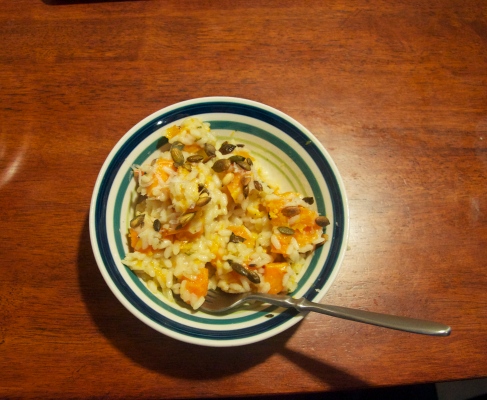
8. Scoop into a bowl, add pepitas and enjoy!

Kale & Cranberry Salad (with Poached Eggs)

Image

I have been having conflicting food feelings of late. Being the holiday season and all, I crave only that which is covered in gravy, beautifully gratined, or involves any of the holiday novelties: cranberries, walnuts, chestnuts, clementines, ginger, molasses, etc etc. But let’s be honest with ourselves, most of these deliciously amazing holiday meals are not on the top of the nutritional list. Hence the dreaded NYRP (New Year Resolution People). You know the ones. I may not be the healthiest person in the world, but I try to keep moderation in my mind daily. These people flood the gyms or go on “diets” for the first week of January and it is all they talk about. Talking about how you just started throwing nutritional yeast onto everything is not something I really care about discussing.

So in order to not become one of them, I am determined to put a holiday twist on some of my favorite healthy lunches and dinners to stave of the cravings for my holiday favorites. (Or give me reason to eat more of them…we shall see).

A side note about poached eggs. I’m rather shocked it’s taken me this long to bring them up. Poached eggs are my favorite way to cook eggs. Sometime during college I learned that eggs are  a budget shopper’s dream. A great source of protein and a ton of nutritional value in the yolk (yes the yolk, while full of good fats like avocado, it also has multiple other positives as described here).  I digress. While scrambled eggs are fastest, and sunny side up the prettiest, nothing tastes as good to me as the classic poach. Throw two on a salad, over roasted veggies, in a grain salad and boom, you have a meal.

Kale & Cranberry Salad

Feeds one person

Ingredients:

  • 3 stalks of Laciato kale *Curly kale can be substituted if necessary as it is easier/cheaper to come by. 
  • 1 small handful of cranberries
  • 2 Tbsp orange juice
  • 1 Tbsp sugar
  • 1 Tbsp walnut oil
  • 1/4 c. walnuts
  • 2 eggs
  • 1 Tbsp white wine vinegar/apple cider vinegar
  • salt/pepper to taste
  • freshly grated parmesan
  • sprigs of parsley

1. Fill a medium sized pot full of water and drop in the 1 Tbsp vinegar. Place on high heat.

2. Using a small sauté pan, roast your walnuts on medium heat, moving them around avery so often as to make sure they do not burn. Place on plate.

3. For your poached eggs, you are looking for the water to be at an almost boil. Bubbles should be seen on the sides and at the bottom, but they should not be moving yet. This is the ideal water temperature. Open eggs one at a time and place each separately in a small bowl or mug. When you see the water as described above, use a wooden spoon and create a whirlpool in the pot. Drop in the eggs one at a time and bring the heat down to a high-medium, allow the eggs to cook for about 4-6 minutes, never let the water boil!

4. Using the same sauté pan as the walnuts, put in your cranberries, orange juice and sugar. Cook on medium heat until you see the cranberries “pop” or crack. Set aside.

Image

5. Julienne the kale and mix with walnuts. Add walnut oil.

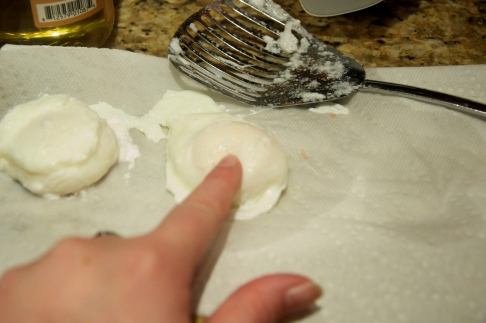
6. Once eggs are done, remove with a slotted spoon and place on wash cloth or paper towel to soak up the last of the water. Eggs should be slightly bouncy when touched.

Image

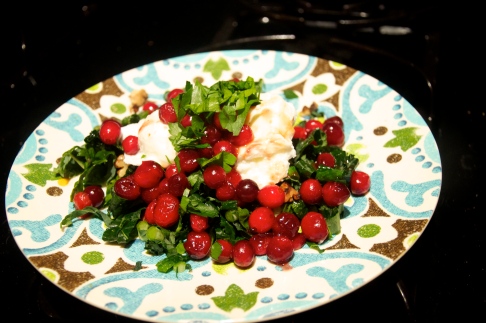
7. Assemble the salad. Put eggs on top of kale and walnuts, give them a dust of salt/pepper. Add the cranberries and finish with a little bit of parmesan and parsley. Enjoy!

Image

Alternatives:

  • To bring this to work, make all parts except for eggs ahead of time, and swap a chicken breast for the eggs.
  • I found it could have used a little more crunch. I would add some freshly baked bread or croutons next time.

From Frost to Snow

It’s that time of year. When I put off listening to Christmas music as long as possible (aka I get to mid-November and find a reason), the leaves start to freeze and get slippery, and you cannot forget your mittens before walking out the door. This is Clarence’s first snowy season, and he is not pleased. Being a retriever, I am sure it will grow on him. Until then, here are a few pictures of his first snow filled adventure:

Image

The classic wind burned face.

Image

Contemplating the long winter ahead.

Image

Properly labeled: “Take me inside Ma!”