Quick Vegetable Soup with Cheddar Dumplings

DSC_0023

This fall has been a little hectic. The weather has gone from freezing, to hot, to normal quicker than you can pick a pumpkin. Outside of the weather, I have started culinary school which has made my life a littler crazier—for the better—both personally and professionally. It is interesting to go from a school with such rigorous academic training as my alma mater, to one that could (in my case) care less about books and more about the discipline and building blocks of a craft. Of course we still have a lot of reading to do, as we are learning classic French techniques and the history of cuisine. But still, not the same.

For me, I just need time to adjust. Adjust to the plethora of people, to an actual kitchen that can hold 20 cooks compared to my measly three, but mostly for me it is about taking myself out of theory and into practice.

Each day I work on my knife skills. My knives have quickly gone from being scary, extremely dangerous weapons, to my friends I can’t leave at school for even one night. They are kept always sharp and always clean. As for my knife cuts themselves, well, they could use work. I tourne (a seven-sided football shape) the day away and maybe get a minuscule better. I julienne for an hour and it looks like I’ve done nothing. Alas. One of these days.

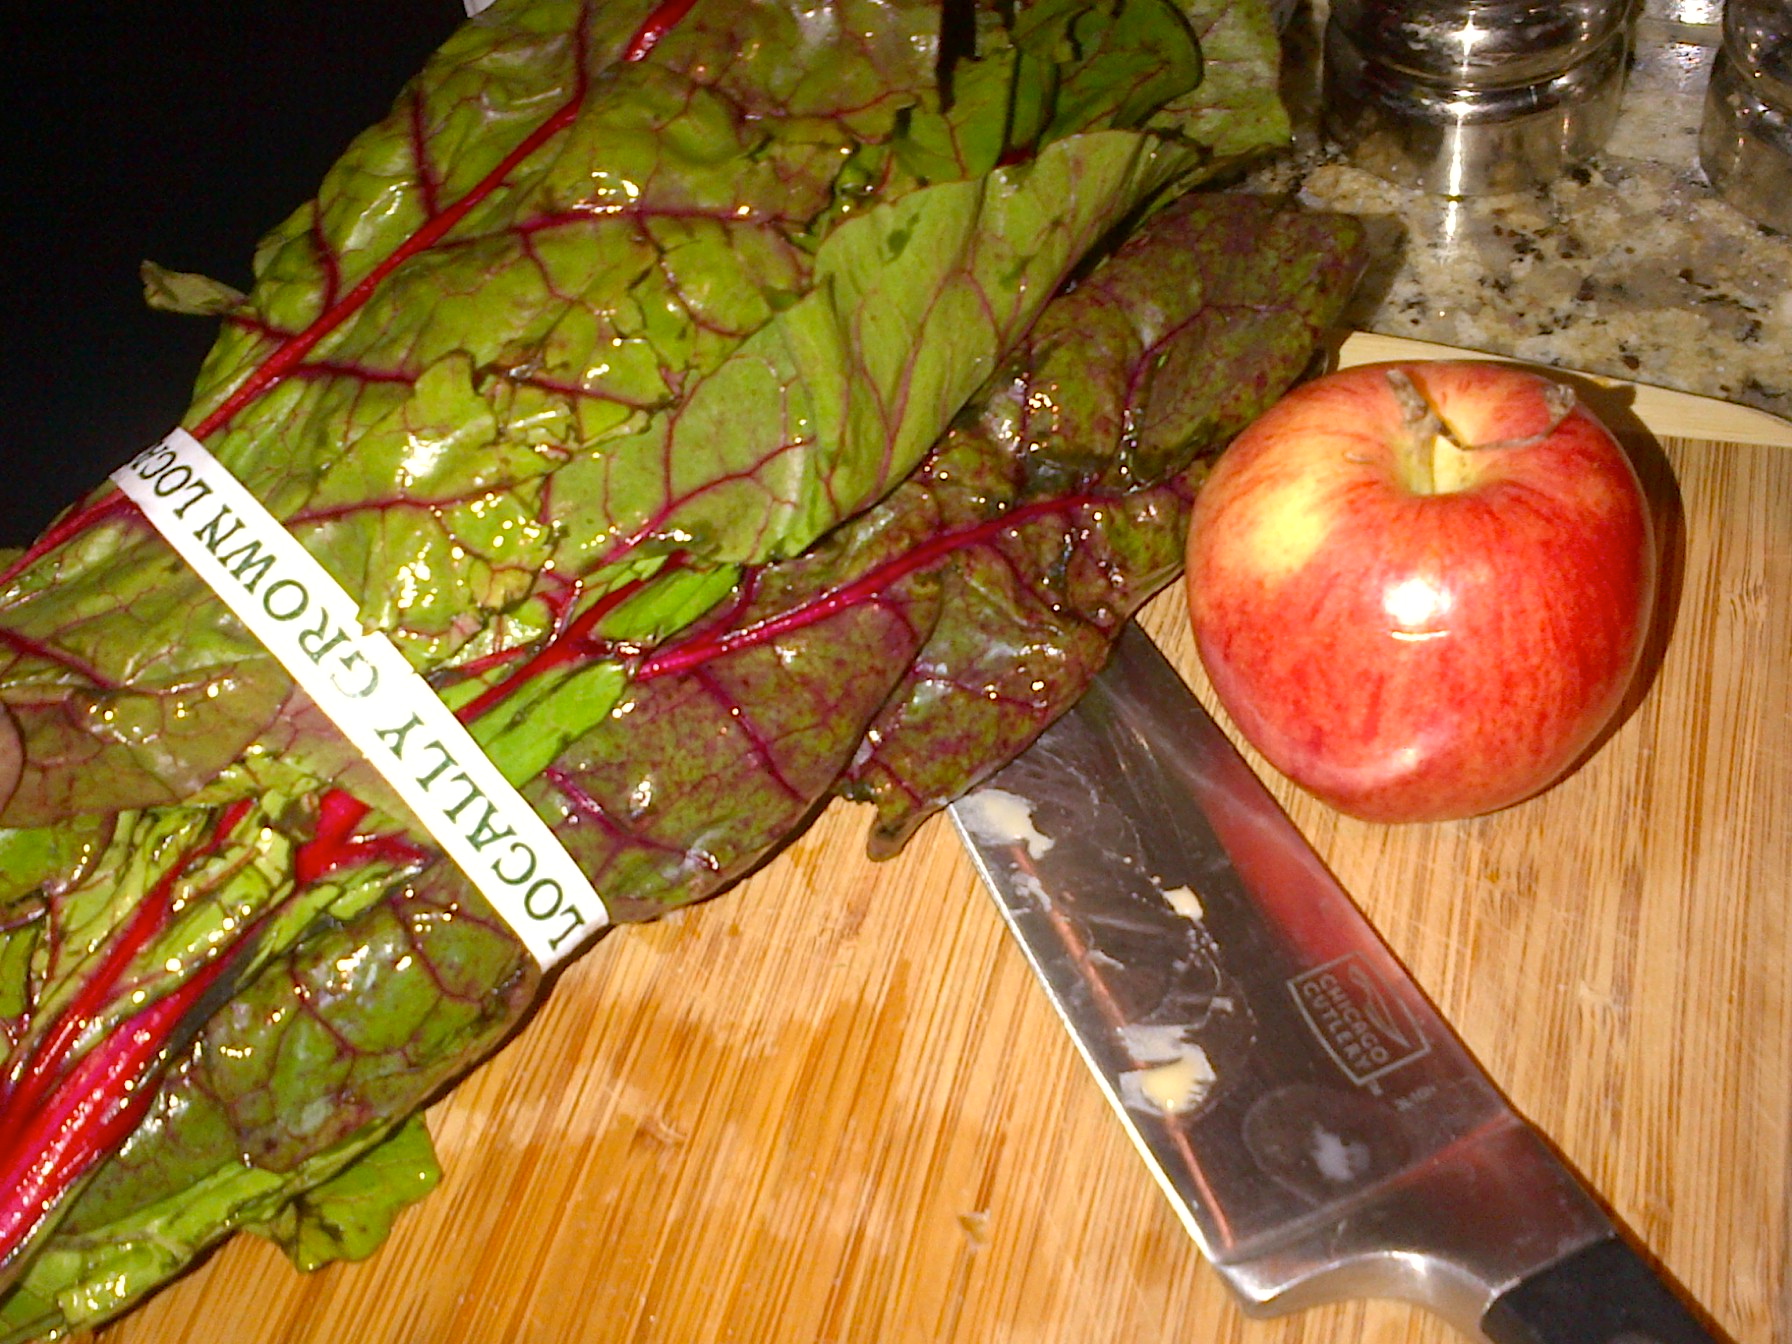
Anyways. The point of this digression is that I have had to figure out what to do with all of my extra produce scraps. At first, I made a lot of mashed potatoes. But dear lord, there are only so many I can eat. I hope, however, to make a mashed potato bread soon but that takes more time than an evening. I’ve moved on to carrots for as many cuts as I can do. They incorporate easier into dishes, and plus, if I get sick of them, Clarence will gladly help out. He strangely really enjoys carrots. But all of this is a warning. My next few recipes will be… creative, to say the least. In this soup alone, I have chiffonade collard greens, brunoised, julienne, and rondelle, and small dice of carrot, small dice of onion, and lozenged a pepper. It’s a little outrageous. In the recipe itself, I will call for a more uniform cut as it will make your soup look pretty and cook evenly, whereas mine, though tasted fantastic, looks a little half hazard.

DSC_0020

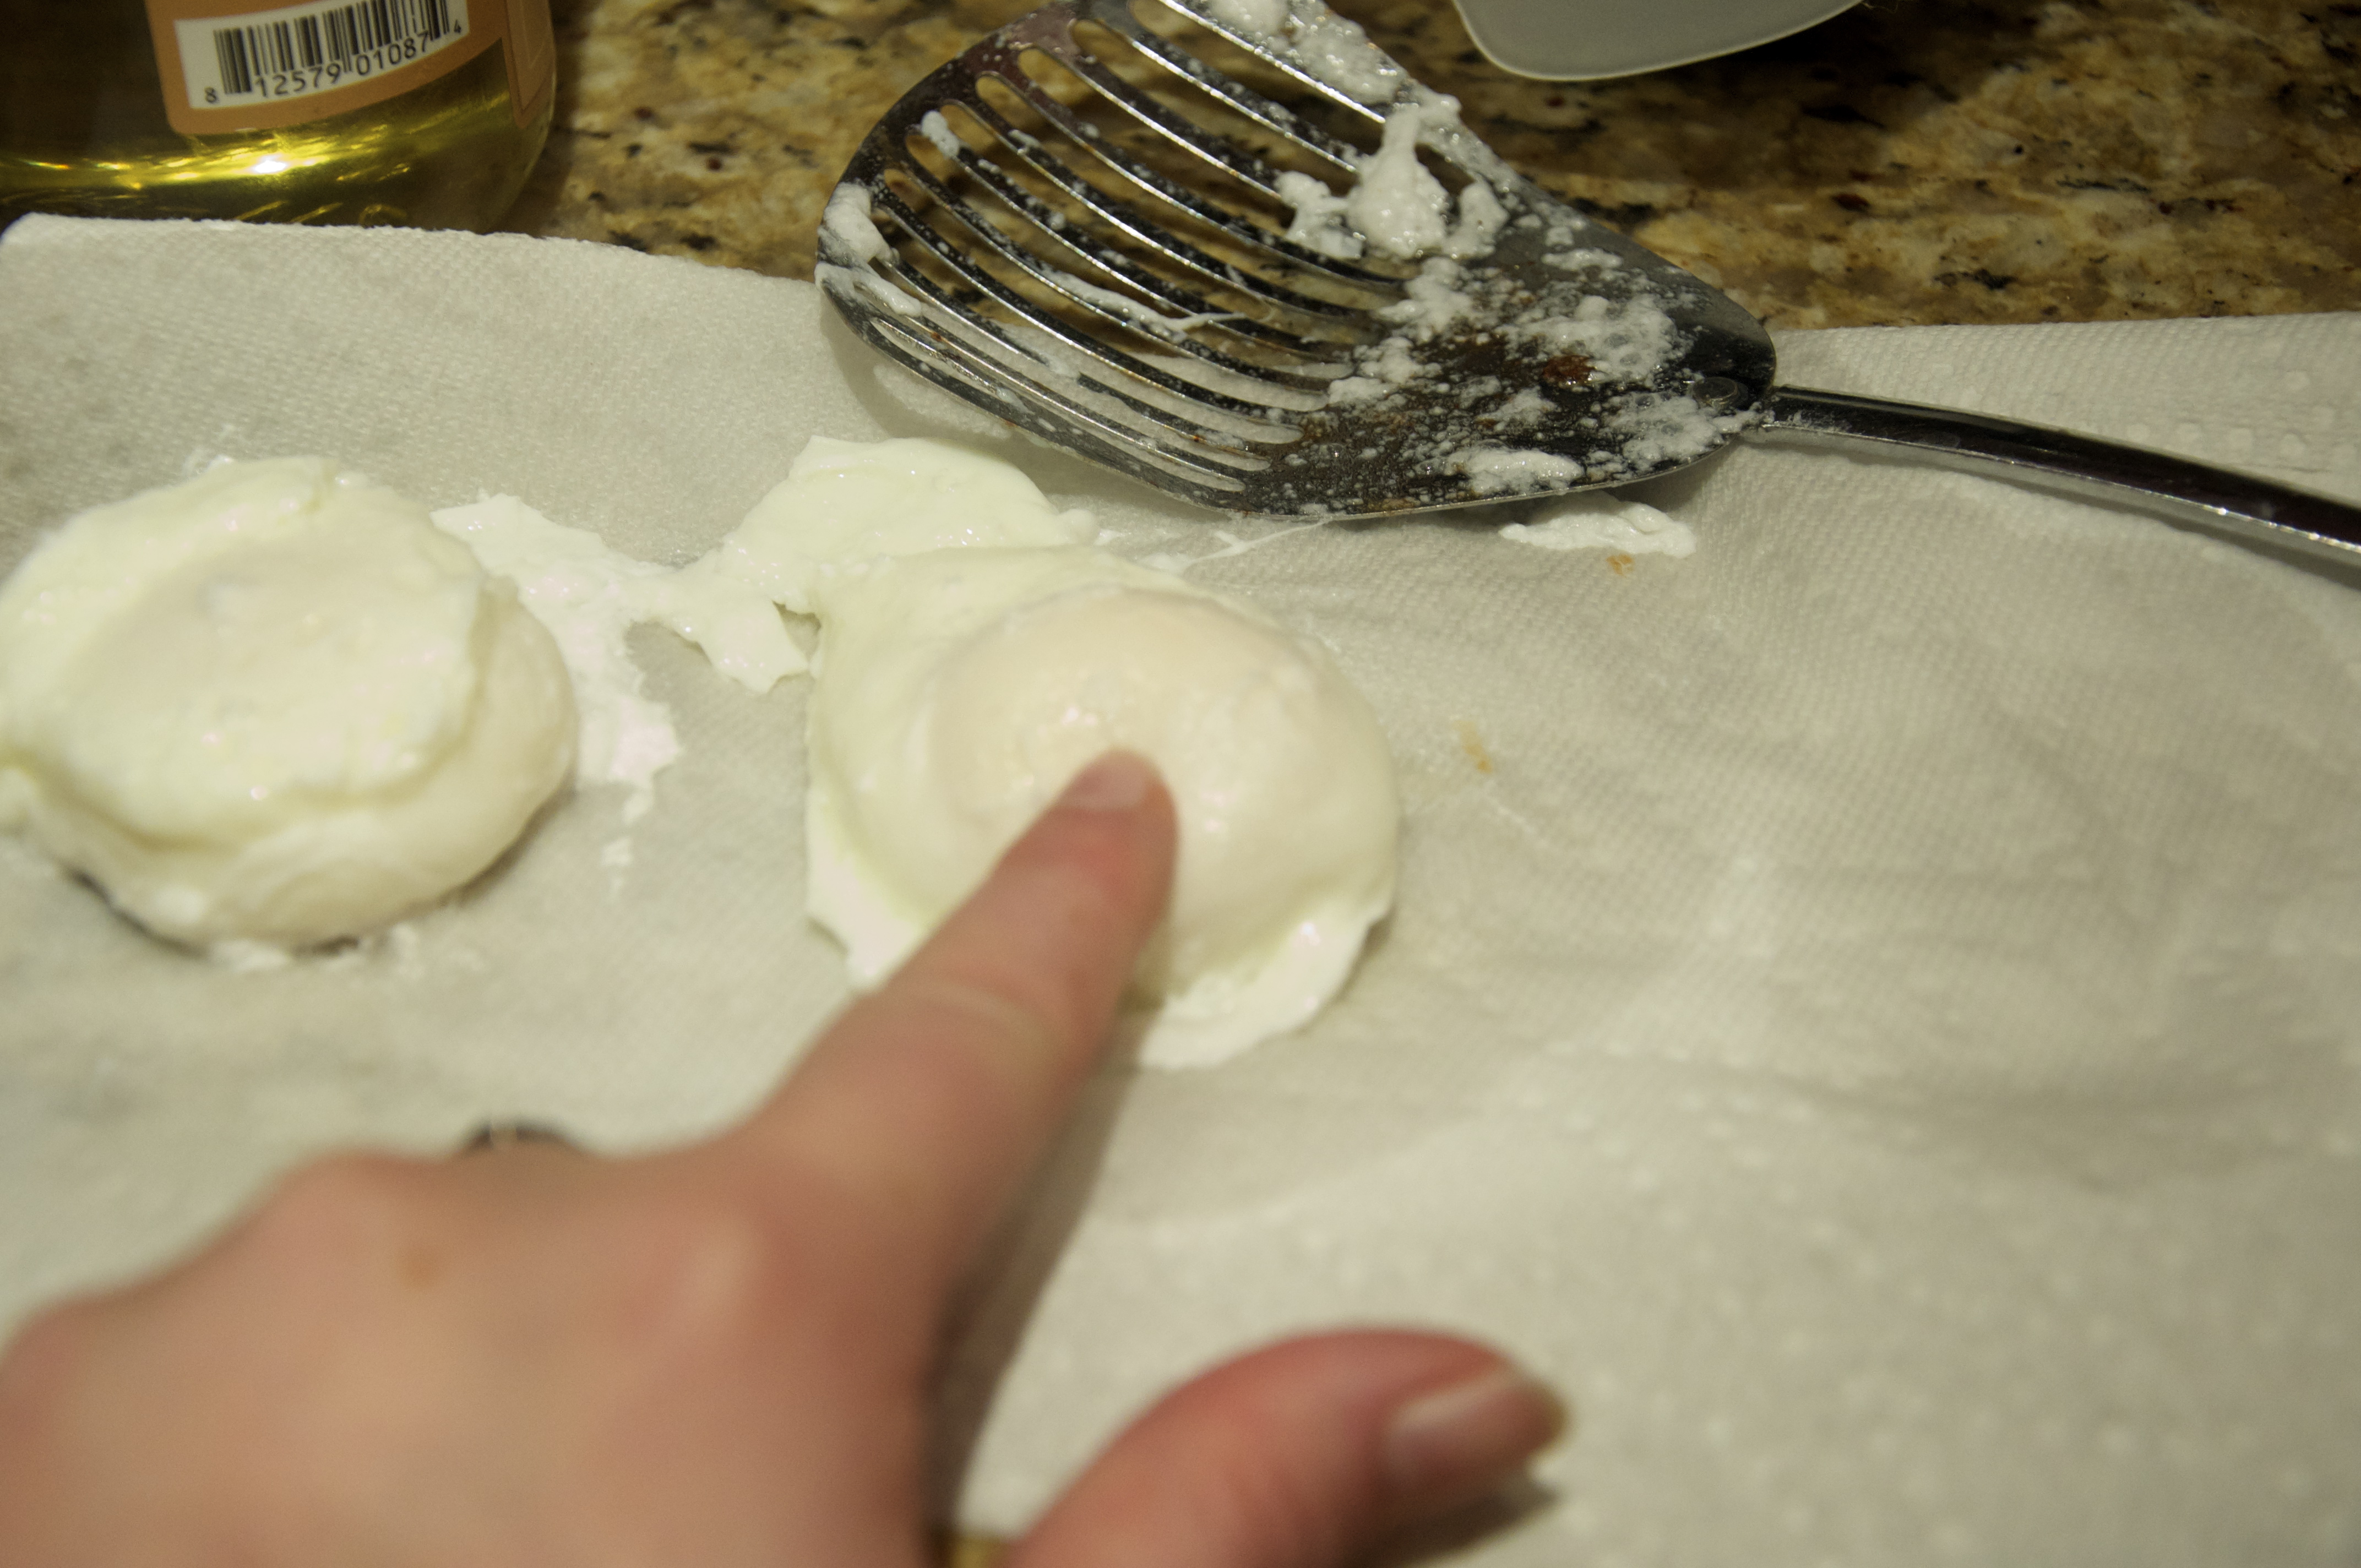
Remember I like to use everything I have on hand. The cheese comes from Renards in Door County, a family tradition and favorite stop, and is a cheese curd (they are the solid parts of soured milk, i.e. baby cheddar). I may have over estimated my ability to eat an entire bag in one week, so why not put it in a dumpling. The herb for the dumpling is actually carrot top leaves. If you don’t have any on hand, feel free to use sage or tarragon—any light herb that will cook easily will do. The carrot top leaves have a slightly bitter taste to them, but are full of nutrients. Perfect for those trying to kick a cold.

DSC_0016

Vegetable Soup with Cheddar Dumplings

Feeds 2-4 people

Ingredients:

Soup:

  • 1 tsp oil
  • 1 C. small dice of carrot
  • 1 C. small dice of onion
  • 1 C. small dice of pepper (green or red)
  • 2 pints chicken stock *use can use vegetable stock here instead to make this a vegetarian meal
  • 2 C. water
  • 1 C. chiffonade of collard greens (kale or even spinach would work)
  • S&P to taste

Dumplings:

  • 1 C. flour
  • 1/2 C. cheddar cheese, grated
  • 1/2 C. fine chop of herbs or greens such as carrot top, tarragon, or sage
  • 1 egg
  • 3/4 C. milk (may need more or less depending on desired thickness of dumpling)
  • 1/2 tsp salt

1. In a medium-sized pot, heat oil to medium high heat and add in the onions, peppers, and carrots. Cook until onions are translucent but not colored.

2. Add chicken stock and water, bring to boil, reduce to simmer.

3. Add in collard greens. Allow soup to cook on low simmer for about 20–30 minutes or until carrots are cooked through.

4. Meanwhile, in a medium bowl, combine all of the dumpling ingredients. Mix well. The dough should be sticky, yet thin enough to form easily into a small ball or spoon shape.

5. Bring soup up to a boil, add in 4 or 5 dumplings at a time (depending on size of pot) cover, and allow to cook for 3–5 minutes. Remove dumplings and set aside. Complete until out of dough.

6. Serve the soup with three dumplings in the center.

Nothing like a warm soup on a cold night. Enjoy!

Biscuits and Gravy

DSC_0025

Everyone has that one food that they crave. For many it’s chocolate, sweets of any kind, ice cream or baked goods. Or all if you make up the general population. For others it is the delightfulness of carbs: breads, croissants (oh god croissants), pasta, and potatoes. I fall into that latter category. If there is an option of a dessert or a cheese plate, you can bet I’m gonna go with the cheese plate. And yes, while I say over and over that baking is not where my talent lies, I must admit that every once in a while I HAVE to make biscuits. It is a need. And what is great about biscuits is that they are customizable. Since fall is coming along nicely here in the midwest, I chose to make sage and cheddar biscuits. Delicious.

But let me rewind. While I happen to love biscuits and gravy, and making this dish allowed me to bake the biscuits that I had been craving for upwards of two weeks, I did not make this dish for myself. After a year together, my last roommate and I had to move our separate ways at the beginning of the summer. Our old apartment was being sold so we were getting the boot. Both our jobs were in different locations and thus we moved neighborhoods apart. A tragic story of friendship displaced.

Can you guess where this story is going? Biscuits and gravy are his favorite food and to celebrate a brunch together in my new place I was in charge of the meal and he was in charge of bringing the bloody marys. We have a very successful friendship. So balanced haha. I made everything by hand, including the sausage that I handmade a few weeks ago. Let me just say, this turned out so delicious that I forgot to take a final picture once everything was plated. Thank heavens I had enough for one more plate the following day (my stomach was happy about that too).

Cheddar and Sage Biscuits with Sausage Gravy

Feeds 3 people

Biscuits Ingredients:

  • 2 C. all purpose flour
  • 2 1/2 Tsp. baking soda
  • 1/2 Tsp. salt
  • 1 stick cold, unsalted butter
  • 3/4 C. milk
  • 1/2 C. sharp cheddar either grated or cut into squares
  • 1/4 C. fresh chopped sage leaves

Sausage Gravy Ingredients:

  • 1 C. ground sausage or about 3 links worth of sausage
    • Remove sausage from links by squeezing gentle from the middle outwards…kinda as if you were milking a cow
  • 1 Tbsp. flour
  • 1/2 pint heavy cream
  • 1 C. chicken stock
  • 5 dashes of hot sauce
  • Additional Spice Options Depending on Sausage Used:
    • If you used a breakfast sausage, I recommend adding a tsp of oregano, basil, and chili flakes to the gravy. This will give the gravy a little more kick.
    • If you don’t want to go spicy, feel free to add in some fresh chopped sage to complement the biscuit instead.

1. Preheat oven to 450 degrees. Mix together all dry ingredients off biscuit list.

2. Wet your knife and cut the butter into small squares.

DSC_0010

3. Using a pastry blender, incorporate the butter into the dry mixture until the butter looks about the size of small peas.

4. Add the chopped sage and cheddar to the mix.

DSC_0011

5. Add in the milk and lightly mix using your hands until you form a rough ball.

6. On a lightly flour surface, roll out the dough using a floured rolling pin until the dough is about 1/2 inch thick.

7. Cut out biscuits using either a cookie cutter or a flour rim of a cup or mug. I tend to improvise a lot.

DSC_0012

8. Bake on a baking sheet for 10-12 minutes. I like to try one to be sure it’s done in the middle 😉

DSC_0014

9. MEANWHILE. While the biscuits are cooking, add the sausage to an iron skillet. Trust me, this is the best option for making the gravy and kind of makes you feel like a pioneer woman in a weird way. At least with my apron on it did for me.

10. Brown the sausage on medium, do not pan out the drippings!

DSC_0016

11. Prepare for the next step, because this part moves quickly. Next to the skillet, have the flour, cream and chicken stock with in easy reach. Once the sausage has browned, add in the flour and mix for about one to two minutes or until the flour and the drippings bind together and turn golden brown.

12. Quickly add in the cream and stir until everything is mixed together. Move the heat up to medium-high.

13. Once the mixture starts to boil, add in the chicken stock slowly, stirring all the while. Turn the gravy down to simmer (somewhere between medium and low where the gravy still bubbles every once and a while.)

DSC_0017

14. Here is the moment where you can add in all the extras. Herbs and hot sauce were my game. about two tbsp chopped sage and 5 dashes of hot sauce. Be sure to keep stirring every once and a while until served.

15. If gravy is too thick, add in a little more chicken stock until desired thickness. If too thin, remove about 1/4 cup of the gravy juices and mix with one tsp of flour. Add back to the gravy, slowing mixing it in. Allow to simmer for two minutes and test again. Continue until desired thickness has been reached.

16. To plate, position two biscuits on the bottom of the plate and top with gravy. I also added two sunny side up eggs to the dish, because everything is better with an egg on top.

Time to dig in!

DSC_0026

Roasted Celeriac and Wild Rice Salad

Image

This week has been busy. Like really busy. I started a new job (EEEEE), am attempting to make friends, trying to keep up with posting, walk the poor pup who thinks I’ve deserted him, finish my book before the weekend, and watch my foodie shows. Yes, I have left out eating, sleeping and working out. But I’ve prepared for this, or well, tried to prepare for this.

Last week I made a lot of soups, (all soups that are here, here, and here) don’t worry, I didn’t leave any out. Those were then frozen for lunches. I also made an insane grocery trip and planned out lunches for a while.

Always inspired by Ottolenghi, I often use the recipe structures he has in his cookbooks and tweak them to what’s available and in season around here. And while when I was in London it was all too easy to get a hold of duck eggs and wild mushrooms, sorrel and sumac, in Chicago it takes a little too much effort. Often times then I find myself finding suitable switches that will keep the integrity of the dish.

*This dish is based off of Ottolenghi’s, Celeriac and lentils with hazelnut and mint recipe found here.

Roasted Celeriac and Wild Rice Salad:

Makes enough for 4 lunches (or 4 small servings)

Ingredients:

  • 1 C. wild rice
  • 1 C. brown rice
  • 2 C. chicken broth
  • 1 bunch fresh thyme
  • 2 Tbsp walnut oil
  • 1 Tbsp salt
  • 1 large celeriac root, peeled and cut into cm thick shapes
  • 3 sprigs fresh mint leaves, chopped
  • 1 Tbsp red wine vinegar (per portion)
  • 1 C. walnuts

1. Preheat oven to 400 degrees.

2. Mix wild and brown rice in medium pot and toast on medium heat for about 3-5 minutes, stirring every so often. Toasted grains aids in their ability to soak up water and adds another dimension of flavor. Add in broth, bring to boil, reduce to simmer, add thyme bunch, and cover for about 45-60 minutes.

Image

3. Meanwhile, peel and cut celeriac into cm sized pieces (about 1cm deep and wide, by 3-4 cm long). Place on sheet pan and drizzle oil and salt. Roast for about 25–30 minutes. Celeriac should be soft and slightly golden.

4. On another sheet pan, lay out walnuts. Once oven is free, place walnuts on center shelf and roast for about 10 minutes. Allow to cool and then roughly chop.

5. Once rice has cooled, mix with celeriac root and 1 tsp of red wine vinegar per portion. When ready to serve hot, mix immediately with walnuts and add chop mint to top. If serving cold, keep walnuts and mint separated from the rice and celeriac mixture until ready to eat.

Roasted Butternut Squash Risotto

Image

I know, it’s been awhile. Forgive me, the holidays (and the fact that I cooked for most family events) made it difficult for me to write as much as I wanted to. There was a blizzard-cookie baking weekend of madness before Christmas, an entire Christmas brunch and dinner on the Day, and another “holiday” meal a few days after. And you know what? I loved every second of it.

Well, except for the last meal that I had to prepare entirely with a steak knife. Do you know how hard it is to make potatoes au gratin with a steak knife? I felt like I was on Cuthroat Kitchen.

Before I get into all these recipes that made my holidays so lovely, I want to talk about my delicious moment of joy found with butternut squash risotto. One thing you should know about my winters is that it is cold here. I bop between my Chicago apt and my Wisconsin hometown pretty often and right now, there is a winter weather warning in both- I just can’t escape. So having lived my whole life in the wintery lands of the north, I have come to love all things roasted in the winter time.

Why Roasting is the best thing ever:

  1. Using the oven aids in heating your home (no joke)
  2. Roasting makes all root vegetables taste like heaven
  3. If you are in a climate similar to my own, you understand that tomatoes just aren’t the same in the winter. Neither are zucchinis or fresh herbs. But you roast those babies with some hand dried basil or sage from summer and you will forget that freshness matters.

Roasting the b-nut is just the start. Do not fear the risotto. Forget the fact that at least 1 person a season goes home on Top Chef for it. Forget the burners and the soggy rice makers. You must have patience. You must stir. And then, you will be a risotto queen.

Roasted Butternut Squash Risotto

Feeds 2 people as a meal, 4 as a side dish

Ingredients:

  • 1 C. arborio rice
  • 1 butternut squash
  • 3 C. chicken broth, preferably homemade, otherwise I use KitchenBasics (no gluten or yeast) *If using stock use a 2:1 water ratio
  • 1 onion
  • 1 tbsp bouquet garni
  • 2 Tbsp butter
  • 1 C. parmesan
  • a handful of roasted butternut squash seeds, or pepitas

1. Preheat oven to 400 degrees.

2. Peel butternut squash, scoop out seeds (save for topping), and dice. Place on cookie sheet and roast for 30-45 minutes until soft and slightly golden on the bottom.

3. Peel and dice the onion, put in large sauce pan with 2 tbsp butter. Cook on medium until onion is soft but not golden.

Image

4. Add in rice and coat in butter. Stir for two minutes or until butter, rice and onion are all incorporated.

5. Add in 1 C. chicken broth and increase temp to medium-high. Continue stirring every so often.

6. When rice has soaked up the first cup of chix broth, add the second cup. Continue to stir every so often. Add in bouquet garni.

Image

7. Allow the risotto to simmer and as the rice soaks up the liquid a second time, add in slowly the last cup. Continue to simmer and add in the parmesan. After about 5 minutes, add in the roasted butternut squash.

8. Scoop into a bowl, add pepitas and enjoy!

Kale & Cranberry Salad (with Poached Eggs)

Image

I have been having conflicting food feelings of late. Being the holiday season and all, I crave only that which is covered in gravy, beautifully gratined, or involves any of the holiday novelties: cranberries, walnuts, chestnuts, clementines, ginger, molasses, etc etc. But let’s be honest with ourselves, most of these deliciously amazing holiday meals are not on the top of the nutritional list. Hence the dreaded NYRP (New Year Resolution People). You know the ones. I may not be the healthiest person in the world, but I try to keep moderation in my mind daily. These people flood the gyms or go on “diets” for the first week of January and it is all they talk about. Talking about how you just started throwing nutritional yeast onto everything is not something I really care about discussing.

So in order to not become one of them, I am determined to put a holiday twist on some of my favorite healthy lunches and dinners to stave of the cravings for my holiday favorites. (Or give me reason to eat more of them…we shall see).

A side note about poached eggs. I’m rather shocked it’s taken me this long to bring them up. Poached eggs are my favorite way to cook eggs. Sometime during college I learned that eggs are  a budget shopper’s dream. A great source of protein and a ton of nutritional value in the yolk (yes the yolk, while full of good fats like avocado, it also has multiple other positives as described here).  I digress. While scrambled eggs are fastest, and sunny side up the prettiest, nothing tastes as good to me as the classic poach. Throw two on a salad, over roasted veggies, in a grain salad and boom, you have a meal.

Kale & Cranberry Salad

Feeds one person

Ingredients:

  • 3 stalks of Laciato kale *Curly kale can be substituted if necessary as it is easier/cheaper to come by. 
  • 1 small handful of cranberries
  • 2 Tbsp orange juice
  • 1 Tbsp sugar
  • 1 Tbsp walnut oil
  • 1/4 c. walnuts
  • 2 eggs
  • 1 Tbsp white wine vinegar/apple cider vinegar
  • salt/pepper to taste
  • freshly grated parmesan
  • sprigs of parsley

1. Fill a medium sized pot full of water and drop in the 1 Tbsp vinegar. Place on high heat.

2. Using a small sauté pan, roast your walnuts on medium heat, moving them around avery so often as to make sure they do not burn. Place on plate.

3. For your poached eggs, you are looking for the water to be at an almost boil. Bubbles should be seen on the sides and at the bottom, but they should not be moving yet. This is the ideal water temperature. Open eggs one at a time and place each separately in a small bowl or mug. When you see the water as described above, use a wooden spoon and create a whirlpool in the pot. Drop in the eggs one at a time and bring the heat down to a high-medium, allow the eggs to cook for about 4-6 minutes, never let the water boil!

4. Using the same sauté pan as the walnuts, put in your cranberries, orange juice and sugar. Cook on medium heat until you see the cranberries “pop” or crack. Set aside.

Image

5. Julienne the kale and mix with walnuts. Add walnut oil.

6. Once eggs are done, remove with a slotted spoon and place on wash cloth or paper towel to soak up the last of the water. Eggs should be slightly bouncy when touched.

Image

7. Assemble the salad. Put eggs on top of kale and walnuts, give them a dust of salt/pepper. Add the cranberries and finish with a little bit of parmesan and parsley. Enjoy!

Image

Alternatives:

  • To bring this to work, make all parts except for eggs ahead of time, and swap a chicken breast for the eggs.
  • I found it could have used a little more crunch. I would add some freshly baked bread or croutons next time.

Sausage and Apple Pie

I admit it, I am afraid of pastry. True, I will make biscuits on occasion, and sometimes dabble in pizza dough. Once or twice a year I will even be pushed into preparing my own pie dough in order to not have to eat a prepared holiday pie. But those are extreme times.

On days off, however, I always feel like taking on a challenge. Cooking something that will require a lot of time, concentration, and skill. The day had been gray and raining and it reminded me of my time in London a few years ago. It was almost always gray and slightly rainy while there. But one meal I grew to love and appreciate were the hand pies that have taken over the city. Sure, everyone has heard of the classic steak and kidney pie. But in the past couple years London has taken on a food revolution; pub food like fish ‘n chips and hand pies were revitalized.

Borough Market, a hub for unique and organic ingredients, artisanal items (like the best granola I’ve ever had), and pop-up carts selling hot hand pies, falafel, curries, and sausages, has essentially everything you could ever want to put in your mouth. I still dream about this place. And their pie cart? A thing of beauty, with classics like a fish pie, and contemporary flavors like roasted rabbit with rosemary and garlic scrapes. Ah the comeback of peasant and working class food. Love.

Back to pies. While a steak and kidney kidney pie sounded…interesting, I thought I would start with something fall-like (typical) and on the easier side.

Sausage and Apple Pie

Feeds about 8

Ingredients:

Pastry-

  • 3 C. flour
  • 1 Tsp salt
  • 3/4 C. butter
  • 1/4 C. plain yogurt (greek also works, whatever is in your fridge!)
  • 3 Tbsp vodka, cold
  • 3–6 Tbsp ice water

Filling-

  • 1 onion, cut
  • 10 sage leaves, roughly chopped
  • 2 apples, peeled and roughly chopped
  • 4 medium sized mild Italian sausages
  • 1 Tsp fennel seeds
  • 1 Tbsp apple cider vinegar
  • 1/2 can hard apple cider

1.  For the pie dough, mix together the salt and flour in a large bowl. Cut butter into small pieces (as small as you can cut them!) and mix into the flour. Using a pastry blender or your hands incorporate the butter until the mixture has a sandy texture to it.

2. Stir in the yogurt and vodka. Slowly (one Tbsp at a time) add the water until the dough comes together. Break into two balls, wrap in cling wrap and place in fridge for at least 30 minutes.

3. Remove the casings from the sausages and brown using a large sauce pan. Add fennel seeds.

Image

4. After sausage is cooked through, place aside but keep the sausage grease. Cook the onion in the sausage grease until soft.

Image

5. Add sage and apples. Cook until soft. Remove and add to sausage.

6. Using the same pan, deglaze the pan with the hard apple cider and add apple cider vinegar.

7. Reduce until thickened. Add to sausage-apple mixture.

8. Preheat oven to 350 degrees and butter one large spring form pan (or just a regular pie pan).

9. Roll out the dough big enough to fully cover the pie pan. Ease the dough into the pan and place in the fridge for ten minutes.

Image

10. Roll out other dough in a circle big enough to cover the whole top of the pie.

11. Pull out pie pan and pour in filling. Cover with second pie dough and cut slits in the middle.

Image

12. Brush the edges of the pie with an egg wash. It will keep the dough together and give the pie a pretty golden look once cooked.

13. Bake for about 40 minutes or until top of pie has a golden edge.

Image

14. Allow pie to rest for 5 minutes before releasing the spring form.

15. Serve with a small side salad.

SWD2: Butternut Squash and Apple Soup

Finally, I can get to the recipe I woke up wanting to make. A few detours, and delicious ones at that, but we are here. Personally, I am not a huge fan of pureed soups. Like most of my dishes, I prefer making and eating meals with lots of texture and different  layers of flavor. I want my meat AND my potatoes. So why am I making a puree soup? Because, it is extremely healthy and very fall like. Maybe I will like it more this time.

Butternut Squash Soup:

Feeds about 6 people

Ingredients:

  • 1 butternut squash
  • 10 sage leaves
  • 1 Tsp salt
  • 4 apples
  • 1Tsp unsalted butter
  • 1 1/2 C. chicken stock or vegetable stock

1. Preheat oven to 425 degrees

Image

2. Peel butternut squash with potato peeler, cut in half and scoop out insides. Cut squash into strips or chunks and place on baking sheet. Cook for about 10-15 mins or until fork tender (smushable).

Image

3. While squash roasts, peel apples and cut into chunks. Add to sauté pan with butter and sage, cook until lightly browned and soft.

DSC_0420

4. Add butternut squash and apple mixture to food processor. Pulse for about 30 seconds. Slowly pour in chicken stock and keep processor on for another 30 seconds. Scrape sides and pulse for another 30 or until smooth. If still a little think, add a little more chicken stock, pulsing with every Tbsp added, until desired consistency.

Serve alongside a small fall salad

Swiss Chard with Apple-Chicken Sausage

While pumpkin is clearly my favorite fall item, I respect that there are other top contenders like apples and hearty greens. In fact, I may have sort of forgotten about them in my pumpkin excitement of the last two weeks.

You’ll come to find that I tend to put kale in a lot of dishes. I like that kale is slightly bitter, and that it keeps a strong structure when cooked. When I went to my local market, however, I saw the swiss chard. The beautiful red stems that flower up into the leafy green top. They were just too pretty to pass up. And for the most part, swiss chard, mustard greens, beet greens, and the many different types of kale, can easily be exchanged in cooked recipes. Beware of collard greens. Unlike the short cook time of the greens mentioned above, collard greens are in the cabbage and broccoli family (weird that that is the same, yes?) meaning that they have to be cooked for much longer in order for them to be tender enough to enjoy.

Anyways. The grocery store to me is what Nordstrom’s or Bloomingdales is to other girls. I want it all. But, as I am heading up to Wisco for some Northwoods adventures this weekend, cuts had to be made. What I ended up with was that stunning rainbow chard––in red and apparently some white ones snuck in––local apples, and a chicken-apple-gouda sausage. Now, I normally stick away from the chicken sausage. Sure they are healthier in the sense that they have less fat in them (fat is what MAKES a good sausage people), but to give them flavor, other more processed foods have to get mixed in. I know, I’m downing the sausage that I just told you I was excited to buy and eat. Sometimes I like the flavors they put in, and then I decide I just don’t care about the processed meat side of it. I mean come on, a spinach and artichoke stuffed chicken sausage, yes. Apple and gouda stuffed chicken sausage, yes. And since it had the apple, it fit my theme for the day. Thus the decision was made.

Swiss Chard with Apple-Chicken Sausage:

Feeds 2 people

  • 1 apple
  • 2 Tbsp walnut oil (I think it gives it an extra earthiness, olive oil is fine)
  • 1 small yellow onion
  • 1 bundle swiss chard
  • 1 package of 4 apple-gouda-chicken sausages
  • 1 tsp apple cider vinegar
  • 1 tsp fresh ground pepper

1. Cut onion into small pieces and caramelize (in small or medium sauté pan) on medium-low for at least 30 minutes.

Chicago-20131010-00008

2. While onions caramelize, cut apple into same size pieces as onion, set aside. Two choices for the sausage preparation: one, leave sausages whole and place in sauté pan with apple pieces, pepper and cook on medium until sausages are nicely browned on the outside. Remove from heat and slice thickly. Set aside. Option two, slice sausages before you cook them. Add them to the pan with apples and pepper and allow to brown on all sides. In option one, the cheese will stay inside the sausage and when sliced after cooking will retain its flavor. The sausage, however, will have less crunchy bits and overall less texture. Option two, your cheese will melt out and coat some of the apple pieces and will lose much of its essence. But, your sausage will have crunchy cheesy bits and have a stronger apple profile. Your choice.

Chicago-20131010-00007

3. Cut ends off of swiss chard and then into ribbons. Add to onions, and add apple cider vinegar. Turn heat to medium and cover. After two minutes stir, cover again. Wait another 3-5 minutes and turn off heat. Add salt to taste.

4. Mix together sausage and a swiss chard in large bowl.

Chicago-20131010-00010

Serving options:

  • Add another tsp of pepper (I ground 5 tellicherry peppers for a stronger punch). This helps offset the sweetness of the dish.
  • Serve with biscuits or some toasted rye bread
  • Add a poached egg on top for a breakfast feel
  • Add either roasted walnuts or pepitas (or leftover cooked pumpkin seeds from all that pumpkin you’ve been having ahem… note to self)

Alternative Options:

  • Vegetarian: Use northern or cannellini beans instead of sausage
  • Depending on what’s in your fridge you can easily exchange the chard for one of the other leafy greens mentioned above.
  • Sausage: Two sausage rants in one post is not enough. This is a dish simply modified by what’s in your pantry and fridge along with your personal taste. Want it spicy? Skip the apples and add in peppers to your onions as they caramelize. Spice it up with red pepper flakes instead of black pepper and a spicy italian sausage (I would definitely add cheese on top, like mozz or parm, to this one)

The Best (and Easiest) Comfort Soup You’ll ever Make: Sausage, Kale, and Tuscan Bean

With Grey’s in the background and my new cider candle lit (thanks mom!), it is just the time to discuss my absolute favorite soup. And let me tell you, that is a bold statement for me. I love soups. All soups. Clam chowder, hearty chili, baked potato, carrot and ginger…I know I know, I’m getting carried away. When fall and winter comes I generally make a soup at least once a week. Something about spending hours chopping vegetables, making homemade stock, and letting it all simmer and smell up the house gives me complete peace of mind. Some people run to let off steam and think; I make soup.

For busy days, however, there is a lot to be said for 60 minute meals. This soup magically falls under this category. All the ingredients are quick to put together and then it needs only 30 minutes to stew to get all the flavors to meld. But, like all soups, this one tastes better a day later.

Confession: There are no photos because I became distracted by my hot toddy. My bad!

Kale, Sausage, and White Bean Soup

Feeds about 6 people

Ingredients:

  • 1 bunch kale
  • 1/2 lemon
  • 1 cannellini or northern white beans (drained)
  • 1/4 C. white wine
  • 4 1/2 C. vegetable or chicken stock *Soup can be made Vegan/Vegetarian
  • 1 1/2 C. water
  • 1 package sausage (depending on taste, can use Polish, Italian or even chorizo sausage. I use Polish kielbasa, pronounced K-O-basa)
  • 1 large onion
  • salt & pepper to taste

1. Cut sausage links lengthwise and then into centimeter wide half-moons. Sauté on medium heat till caramelized on both sides. This should take about 10-15 minutes. Flip sausage pieces about every 2-3 minutes to prevent burning.  Remove from heat and set aside.

2. Cut onion: use link here for helpful tips. Using the same pan (uncleaned) from the sausage add in the onion and sauté on medium-low for 5 minutes. Add in white wine and cook for 10 more minutes or until onions are soft. 

3. Warm up large pot and add in onion and wine mixture. Add a touch of salt. Pour in stock, water, sausage, and beans. Bring to boil, reduce to simmer.

4. While soup simmers, cut off the stem ends of the kale. Two options here: one, rip the leafy part off of the stem into small pieces or two, cut kale into strips including stem. This is really a choice of texture. I personally don’t mind the stem, and as it is a good source of fiber, I feel healthier keeping it.

5. Add kale to soup and the juice of half a lemon (lemon makes everything taste better!). Allow to simmer for at least 30 minutes. Remember, the longer the better.

Alternative options:

  • Leave out sausage, exchange chicken stock for vegetable stock, and just sauté onion in 1 tsp of olive oil instead to make vegetarian/vegan.
  • Add a tsp of a strong herb like rosemary, caraway seed, red pepper flakes, or tarragon to the onions to add an extra layover of flavor to the soup. Don’t get carried away, one spice or herb is enough.
  • I generally use my own stock that I make and freeze, but if that is too much, pick a stock that is organic and gluten free. Trust me, you want to check the labels on these.

Serve with a warm loaf of bread––toast works just as well–– and a light salad.