“Cassoulet”

Image

Struggles. So many struggles. No internet, no heat, no hot water: the last few weeks have been a little hard here in Chicago. With the exception of an amazing vacation with my college besties, very little cooking has been done. Though in fairness, the gas was turned off and thus no stove or oven.

Excuses, excuses. I should have at least put up one of the few recipes I’ve made in the past weeks. For this, I do apologize. But to be very frank, not much as changed in the last few weeks. Chicago is still freezing, snow is still falling, and I still carve out at least one night a week to cook (this weekend the recipes will descend).

I realized a few weeks ago that I had yet to take out my slow cooker this year. Which is odd as nothing is better than walking in after a long day at work and having your house smell of roasted meats. I mean, realllly. My favorite meal growing up was my mom’s pot roast. Simple and to the point, it was always just slow cooked carrots, onions, roast and some salt and pepper. I will have to make it one of these days, now that I’m literally craving it. I always joke with my mom about how I learned how to cook out of necessity (microwave meatloaf anybody?), but this was the one thing I would beg her to make.

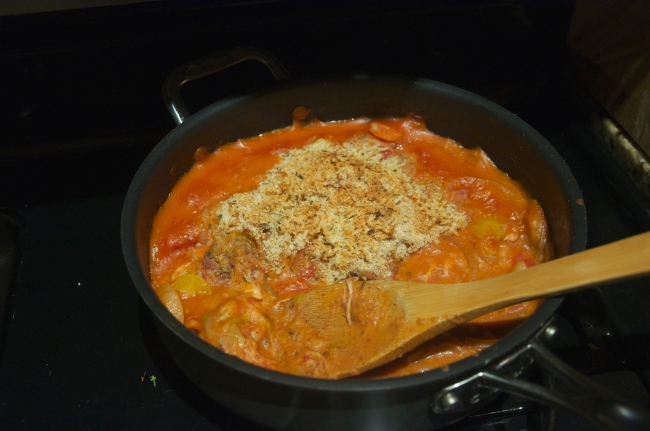
Anyways, back to the task at hand. I wanted to use the slow cooker and I had been meaning to make a cassoulet. Technically a French casserole of white beans, sausage, chicken, and herbs. And while I tried to stay as true to it as I know, this cassoulet turned out to be more like a regular chicken stew. Nothing wrong with that.

“Cassoluet”

Feeds 4–6 people

Ingredients:

  • 2 cans white beans
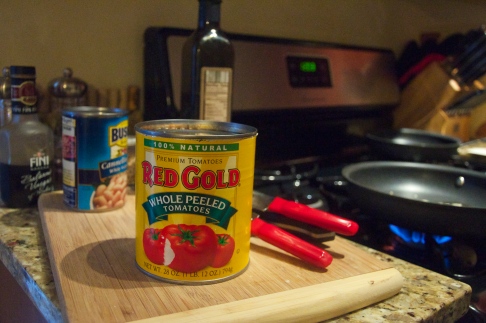
  • 1 32 oz can whole, peeled tomatoes
  • 2 hot or mild Italian sausages
  • 4 chicken thighs (or 2 chicken breasts)
  • 2 whole carrots, peeled and chopped
  • 2 small (or one medium) white onions, chopped
  • bouquet garni (thyme, rosemary, bay leaves)
  • 2 tsp salt
  • 2 C. chicken stock
  • *breadcrumbs and parmesan for finishing

1. Soften the onions and carrots in a pan. Move to slow cooker.

2. Add in tomatoes (mush them up a little), chicken stock and beans.

3. Brown the chicken, just enough so that there is a little golden tint to it, add to slow cooker.

4. Brown the sausage, just enough that it is cooked on the outside. Cut into pieces, add.

5. Through in the rest of the spices and salt, cover and cook on low for 8 hours.

6. Before eating, take out the serving portion and cover in breadcrumbs and parmesan (as much as you like really), and put under the broiler for about 5 minutes.

Serve with a crusty piece of bread. Enjoy!
 

White Bean Patties with Quick Tomato Sauce

Image

I have something to admit, I love canned beans. Not all beans mind you, the lima and kidney varieties are a little too “bean” for me, but the northern, garbanzo (chickpeas), and cannellini beans are where it’s at. Throw a can of white beans in with some garlic and olive oil, mix in some kale and a poached or sunny side egg and you’ve got a lunch, or light dinner, of champions.

I’ve been feeling Italian lately, and like always, have seemingly nothing fresh left in my fridge. Don’t get the wrong idea about me though, I feel like I always complain about how I have nothing left in my fridge. The problem is that I go through the fresh stuff too fast. I grocery shop for two weeks at a time and by the second week I normally have a handful of aging Brussels left, the bottom of a kimchi bottle, and 3 eggs. This is when I get creative.

Welcome the world of canned tomatoes and beans.

White Bean Patties with Quick Tomato Sauce:

Feeds 2–3 people

Ingredients:

  • 1 can white beans
  • 1 32oz can of peeled, whole tomatoes
  • 4 cloves or garlic
  • 2 Tbsp oregano
  • 2 Tbsp basil
  • 1/2 C. breadcrumbs
  • 1 Tsp salt
  • 2 eggs
  • olive oil as needed

1. Mince 2 cloves of garlic and sauté on medium-low in a medium sauce pan until fragrant.

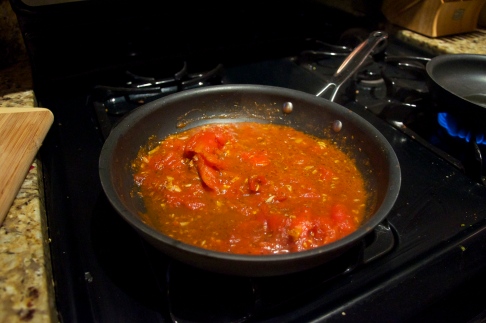
2. Pour liquid from tomato can into pan, squish tomatoes between your hands until roughly pulled a part. If this makes you a little squeamish (though I find it oddly satisfying) pulse the tomatoes in a blender. *Keep the tomatoes rough, not blended

3. Mix in 1 Tbsp oregano and basil. I used dried herbs but if you have access to fresh basil use about 8-10 leaves and chiffonade them.

4. Allow sauce to cook on low while preparing the patties.

Image

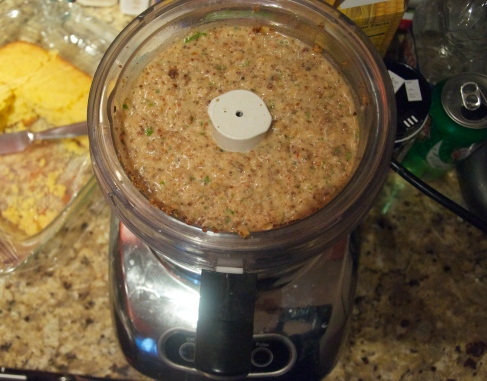
5. In a food processor, add drained beans, the rest of the garlic and herbs, breadcrumbs, salt, and eggs. Pulse until thoroughly mixed.

Image

6. In a small sauté or frying pan add a drizzle of olive oil and spoon out the bean mixture like pancakes. Cook for about 2–3 minutes on each side. Continue until all patties are made.

Image

7. Place about 3–4 patties on a plate and pour some tomato sauce over. Dig in!

Roasted Garlic Focaccia Bread

Image

Ah January, the month where boat dreams start slipping into my nightly repertoire. The beginnings  of imagining warm breezes, and summer cookouts. The time to pull it together and realize those won’t happen for another 4–5 months. And even then, up here, you cannot predict.

These past few days have been driving me a little stir crazy. I don’t start my (new!) job for another week, which means I have some days to play. And while I have a list of all the things I want to get done before I start, it needs to not be -10 degrees outside in order for me to leave the premises. I have some serious book and tea shopping to get done.

So while I was holed up in my little apt, trying to keep the heat down so that we don’t have a gigantic gas bill again, I thought, if anything, what could make this day better? Bread. Bread and soup. I then picked out the garlic soup from the freezer and figured I’d take the garlic route with the bread too. Not like I was going to be seeing or speaking to anyone this iceland of an evening.

Baking is hard. This focaccia, not so hard.

Roasted Garlic Focaccia Bread:

Feeds 2–3 people (or 1 if you are a bread fiend like myself)

Ingredients:

  • 2 C. bread or all purpose flour (if that’s all you have)
  • 1 Tsp yeast
  • 3/4 C. warm water
  • 1 Tsp sugar
  • 3 Tbsp olive oil and some drizzling oil
  • 2 Tbsp rosemary
  • 1 Tbsp salt
  • 1 head of garlic

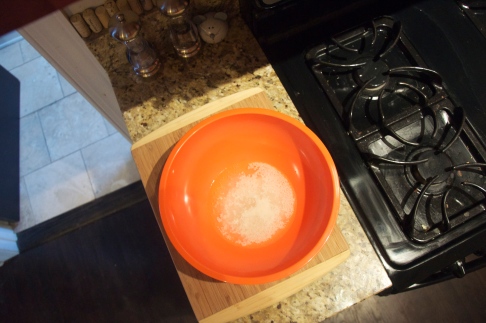
1. Activate yeast by mixing it with the warm water and sugar. Allow to sit for about 5 minutes.

Image

2. In a mixer bowl, gently mix the flour, salt, rosemary, and 1 Tbsp olive oil.

3. Make a pond in the middle of the dry ingredients and pour in yeast water. Mix by hand until roughly incorporated.

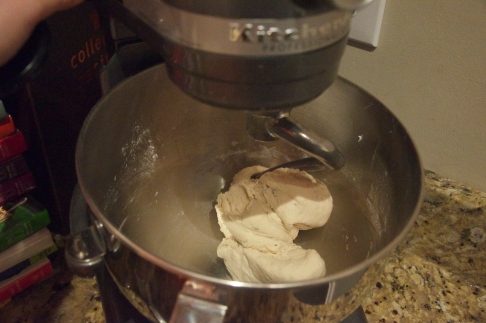
4. Using the kneading hook on your mixer, place on level 2 for 10 minutes. If you don’t have a mixer, continue kneading the dough by hand for 10 minutes (hard!).

Image

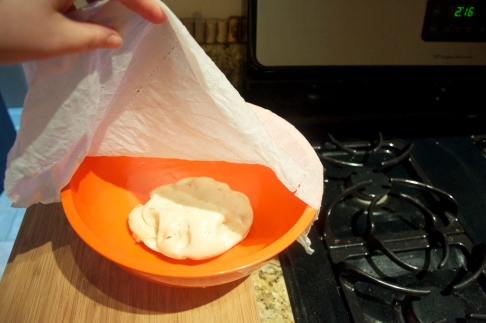
5. Remove dough from mixer and place in medium sized bowl that has a drizzle of olive oil spread along the sides (so that when the dough rises it won’t stick). Cover with a damp paper towel or kitchen towel and place somewhere that is around 70 degrees.

*While this seems silly, my bread barely rose because my apt is in the middle of Chiberia. Yes. I am pulling THAT card. Try putting it in a small, inclosed room. 

Image

6. Allow the bread to rise from anywhere between 3–8 hours.

7. While the bread is nearing the end of its rising, heat the oven to 375 degrees.

8. Take your garlic head and slice off the top, enough so that each clove is slightly exposed.

9. Drizzle some olive oil on the top, wrap it in aluminum foil, and pop it in the oven for 45 minutes.

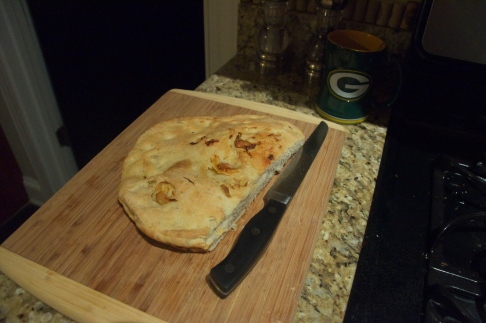
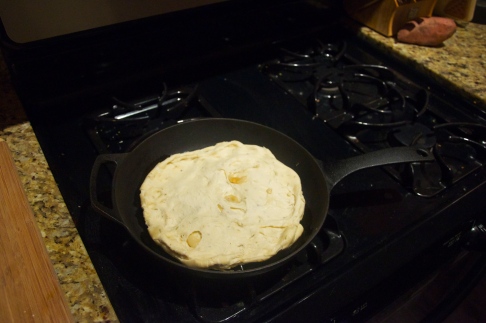
10. Once the bread has risen, put 1 Tbsp of olive oil in the bottom of a iron skillet and then place bread on top, shaping it into the pan. *The olive oil will help give the bottom of the focaccia a good crunch.

Image

11. Once the garlic is done, remove the roasted cloves by squeezing the bottom of the garlic head and popping them out of their skins.

12. Using your finger, make little holes in the top of the bread and push the garlic cloves into them. Cover some if you like, or leave them all poking out.

13. Raise the oven temp to 400 degrees and bake your bread from 25–35 minutes. My arctic atmosphere caused it to take a little longer.

Serving options:

  • Good olive oil and balsamic
  • Alongside some soup

Wine and Cherry Beef Stew

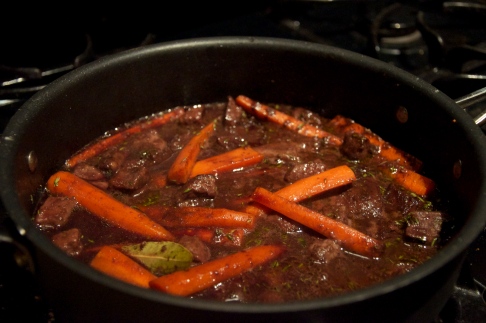
Image

Have you ever invited someone over for dinner and then realize that you have barely anything in your fridge? Well, I’ve been traveling around a lot lately so my trip to the grocery this week was a struggle. How much weight can I carry 6 blocks? Milk or pickles? Cans of beans or tomatoes? Some serious choices had to be made and ingredients had to be left behind. Thus my very empty fridge and pantry.

But I’ve always been a rather scrappy cook (something I learned from my college days) and knew I could find something delicious to whip up. In my freezer I find the last of my frozen meat, a package of stew meat. Stew meat is cuts of a beef roast like chuck or butcher cuts of steak and loin, and are generally tough meats that need to be cooked or braised for a while in order to become tender. Add some butter, the last cup of red wine and some cherry juice I had for a cocktail recipe a while back and wah-lah, a perfect braising liquid.

Leaning towards the beef bourguignon route of preparation, I added some carrots, kept adding to the braising liquid, and allowed the stew to, well, stew for a few hours. Served with the Herb Spaetzle, it made a pretty fancy meal for having nothing in the house.

Wine and Cherry Beef Stew

Feeds 2 people

Ingredients:

  • 1 package stew meat (about 1-2lbs)
  • 1 C. red wine
  • 3/4 C. cherry juice
  • *water as needed for braising liquid
  • 2 bay leaves
  • 1 tsp thyme
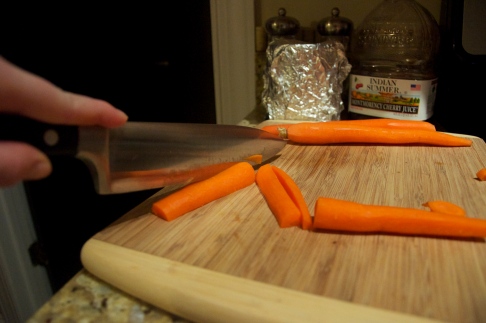
  • 3 whole carrots, peeled and cut into fourths
  • 1/2 C. flour
  • 3 Tbsp butter
  • 1 tsp salt

Image

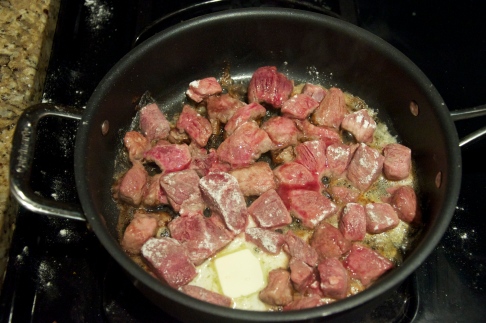
1. Dry of each piece of meat and dredge in flour. This will give the beef a beautiful sear and allow it to soak up the flavors of the braise.

Image

2. Saute meat in large sauce pan with the melted butter, sprinkle with salt. Cook until meat looks golden brown. (If you have an onion, I would chop and add here. It will add a dimension of flavor.)

3. Add in wine, cherry juice, and herbs.

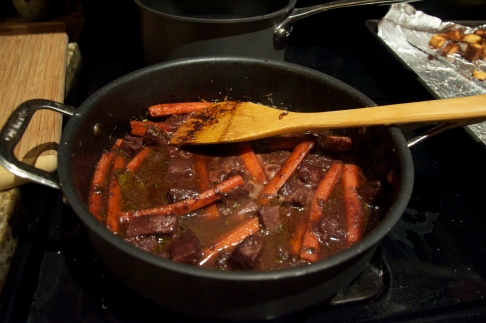
4. Add in carrots.

Image

5. Reduce heat to low and allow stew to braise for up to 2 hours. Make sure the braising liquid is always at the same height as the meat by adding a little water at a time. Stir every half hour. Remove bay leaves and enjoy!

Serving options:

  • Classically this goes great with potatoes: mashed, gratined, or even just baked.
  • Risotto would add heartiness and richness as well as is substantial enough to side with the stew.
  • Small pasta like fuselli, spaetzle, or farfalle.

Herb Spaetzle

Image

I used to think that I was the opposite of a picky eater. And in a sense, that’s true. I will try everything and anything once. I don’t consider myself very squeamish, and I like trying as much food as possible when I go to new restaurants. Yes, I am that person who likes to taste everyones dish. Sorry I’m not sorry.

But while I consider myself a cosmopolite, there are a few ingredients and dishes in the world that I am either incredible picky about or avoid at all costs.

-Beets=avoid at all costs
-Mustard=only the grainy kind and only in certain preparations
-Pasta (yes, pasta my friends)=only certain types *unless I’m in Italy or a really good Italian restaurant* but at home, it is a rarity in my kitchen. I do love mac and cheese, shapes only please, and I do have a favorite Italian deli where I buy housemade ravioli on occasion. I think I was ruined by overcooked pasta in cafeterias as a kid. It’s a texture issue.

And while Italian pasta can be fantastic, I, unfortunately, struggle still with making it. My kitchen has been too hot, my pasta was too thick, etc etc…One day I will get it right. In the meantime, I’ve reached back to my roots and made a German pasta, spaetzle. More or less a little baby dumpling that is impossible to screw up.

Herb Spaetzle

Feeds 3-4 as a side dish

Ingredients:

  • 1 1/2 C. all purpose flour (you can do a 2:1 ratio with whole wheat flour to make it a little healthier)
  • 1 tsp baking powder
  • 1/2 C. cold water
  • 2 eggs
  • 1 tsp salt
  • 2 tsp dry herbs or herb blend

1. Bring a pot of salt water to a rolling boil.

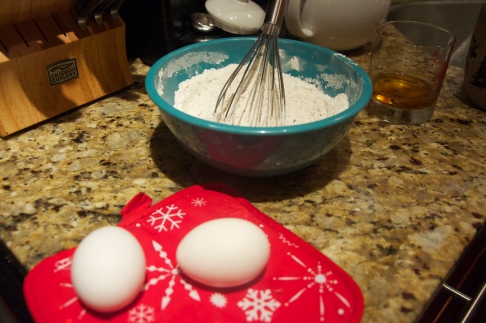
2. Mix all dry ingredients together and then add eggs and water.

3. *For herbs, think of what they are served with. I’ve used an Italian mix, a bouquet garni, as well as just rosemary or thyme.

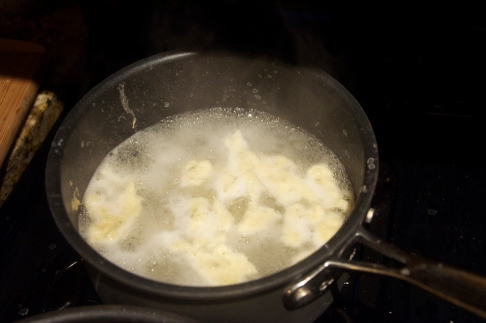
4. Using a potato ricer *jump to #5 if you don’t have one* put in spaetzle dough and over the water drop in about a third of the rice sized dumplings. Wait for the dumplings to rise, and use a slotted spoon to remove them. Repeat until all spaetzle dough is gone.

Image

5. If you do not have a potato ricer, which is reasonable since most people have no idea what that even is, there are other options. I think the easiest is to add a little more water (about 1/4 cup), and using two spoons (one wet) slowly drop small pieces of dough into the water. It takes a while but it has proven to be the most consistent. Be creative here, spaetzle doesn’t have to have a specific shape so there is no one to judge!

Serving Options:

  • After removing spaetzle from water, place in sauté pan with a little bit of butter and cook until lightly golden. Add this to roasted vegetables and you have a great vegetarian meal or lunch.
  • Serve alongside a beef stew or broasted chicken.
  • Brown it in butter, throw some parsley on it and enjoy a guilty pleasure.

Roasted Butternut Squash Risotto

Image

I know, it’s been awhile. Forgive me, the holidays (and the fact that I cooked for most family events) made it difficult for me to write as much as I wanted to. There was a blizzard-cookie baking weekend of madness before Christmas, an entire Christmas brunch and dinner on the Day, and another “holiday” meal a few days after. And you know what? I loved every second of it.

Well, except for the last meal that I had to prepare entirely with a steak knife. Do you know how hard it is to make potatoes au gratin with a steak knife? I felt like I was on Cuthroat Kitchen.

Before I get into all these recipes that made my holidays so lovely, I want to talk about my delicious moment of joy found with butternut squash risotto. One thing you should know about my winters is that it is cold here. I bop between my Chicago apt and my Wisconsin hometown pretty often and right now, there is a winter weather warning in both- I just can’t escape. So having lived my whole life in the wintery lands of the north, I have come to love all things roasted in the winter time.

Why Roasting is the best thing ever:

  1. Using the oven aids in heating your home (no joke)
  2. Roasting makes all root vegetables taste like heaven
  3. If you are in a climate similar to my own, you understand that tomatoes just aren’t the same in the winter. Neither are zucchinis or fresh herbs. But you roast those babies with some hand dried basil or sage from summer and you will forget that freshness matters.

Roasting the b-nut is just the start. Do not fear the risotto. Forget the fact that at least 1 person a season goes home on Top Chef for it. Forget the burners and the soggy rice makers. You must have patience. You must stir. And then, you will be a risotto queen.

Roasted Butternut Squash Risotto

Feeds 2 people as a meal, 4 as a side dish

Ingredients:

  • 1 C. arborio rice
  • 1 butternut squash
  • 3 C. chicken broth, preferably homemade, otherwise I use KitchenBasics (no gluten or yeast) *If using stock use a 2:1 water ratio
  • 1 onion
  • 1 tbsp bouquet garni
  • 2 Tbsp butter
  • 1 C. parmesan
  • a handful of roasted butternut squash seeds, or pepitas

1. Preheat oven to 400 degrees.

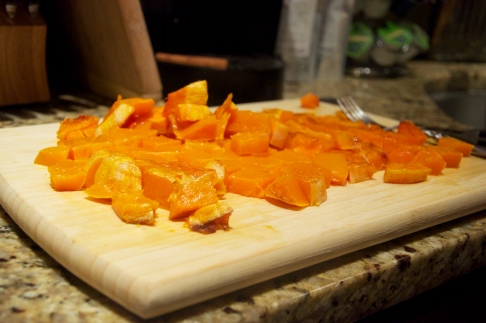
2. Peel butternut squash, scoop out seeds (save for topping), and dice. Place on cookie sheet and roast for 30-45 minutes until soft and slightly golden on the bottom.

3. Peel and dice the onion, put in large sauce pan with 2 tbsp butter. Cook on medium until onion is soft but not golden.

Image

4. Add in rice and coat in butter. Stir for two minutes or until butter, rice and onion are all incorporated.

5. Add in 1 C. chicken broth and increase temp to medium-high. Continue stirring every so often.

6. When rice has soaked up the first cup of chix broth, add the second cup. Continue to stir every so often. Add in bouquet garni.

Image

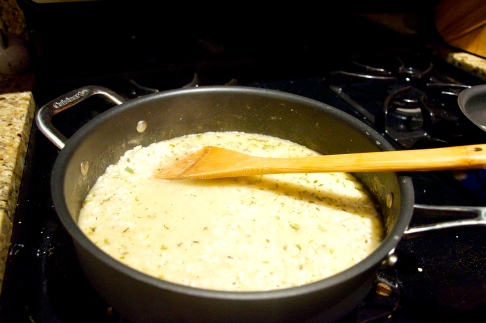
7. Allow the risotto to simmer and as the rice soaks up the liquid a second time, add in slowly the last cup. Continue to simmer and add in the parmesan. After about 5 minutes, add in the roasted butternut squash.

8. Scoop into a bowl, add pepitas and enjoy!

The Best (and Easiest) Comfort Soup You’ll ever Make: Sausage, Kale, and Tuscan Bean

With Grey’s in the background and my new cider candle lit (thanks mom!), it is just the time to discuss my absolute favorite soup. And let me tell you, that is a bold statement for me. I love soups. All soups. Clam chowder, hearty chili, baked potato, carrot and ginger…I know I know, I’m getting carried away. When fall and winter comes I generally make a soup at least once a week. Something about spending hours chopping vegetables, making homemade stock, and letting it all simmer and smell up the house gives me complete peace of mind. Some people run to let off steam and think; I make soup.

For busy days, however, there is a lot to be said for 60 minute meals. This soup magically falls under this category. All the ingredients are quick to put together and then it needs only 30 minutes to stew to get all the flavors to meld. But, like all soups, this one tastes better a day later.

Confession: There are no photos because I became distracted by my hot toddy. My bad!

Kale, Sausage, and White Bean Soup

Feeds about 6 people

Ingredients:

  • 1 bunch kale
  • 1/2 lemon
  • 1 cannellini or northern white beans (drained)
  • 1/4 C. white wine
  • 4 1/2 C. vegetable or chicken stock *Soup can be made Vegan/Vegetarian
  • 1 1/2 C. water
  • 1 package sausage (depending on taste, can use Polish, Italian or even chorizo sausage. I use Polish kielbasa, pronounced K-O-basa)
  • 1 large onion
  • salt & pepper to taste

1. Cut sausage links lengthwise and then into centimeter wide half-moons. Sauté on medium heat till caramelized on both sides. This should take about 10-15 minutes. Flip sausage pieces about every 2-3 minutes to prevent burning.  Remove from heat and set aside.

2. Cut onion: use link here for helpful tips. Using the same pan (uncleaned) from the sausage add in the onion and sauté on medium-low for 5 minutes. Add in white wine and cook for 10 more minutes or until onions are soft. 

3. Warm up large pot and add in onion and wine mixture. Add a touch of salt. Pour in stock, water, sausage, and beans. Bring to boil, reduce to simmer.

4. While soup simmers, cut off the stem ends of the kale. Two options here: one, rip the leafy part off of the stem into small pieces or two, cut kale into strips including stem. This is really a choice of texture. I personally don’t mind the stem, and as it is a good source of fiber, I feel healthier keeping it.

5. Add kale to soup and the juice of half a lemon (lemon makes everything taste better!). Allow to simmer for at least 30 minutes. Remember, the longer the better.

Alternative options:

  • Leave out sausage, exchange chicken stock for vegetable stock, and just sauté onion in 1 tsp of olive oil instead to make vegetarian/vegan.
  • Add a tsp of a strong herb like rosemary, caraway seed, red pepper flakes, or tarragon to the onions to add an extra layover of flavor to the soup. Don’t get carried away, one spice or herb is enough.
  • I generally use my own stock that I make and freeze, but if that is too much, pick a stock that is organic and gluten free. Trust me, you want to check the labels on these.

Serve with a warm loaf of bread––toast works just as well–– and a light salad.